
手把手教你图形化安装 OceanBase 4.3.5 社区版和 OCP Express
本文将 x86 架构的 CentOS Linux 7.4 镜像作为示范环境,逐步演示如何通过OBD图形化工具完成OceanBase数据库及其OCP Express管理平台的一站式部署,助力用户实现快速部署与应用。
本文作者:ShunWah,在运维管理领域兼具坚实的理论基础,与多年深厚的专业实践经验。精通自动化运维流程,对于OceanBase、MySQL等多种数据库,具备从初始部署到后期维护的全链路管理能力。拥有OceanBase的OBCA和OBCP认证,以及其他各数据库厂商的认证。活跃于CSDN等各技术平台,原创文章多次被首页推荐。
引言
在当前数据库技术快速发展的背景下,OceanBase凭借其高可用架构、弹性扩展能力和出色的性能表现,在越来越多的企业核心系统上被应用。最新发布的OceanBase 4.3.5 社区版,为开发者社区和企业提供了更多的新功能。
本文将 x86 架构的 CentOS Linux 7.4 镜像作为示范环境,逐步演示如何通过OBD图形化工具完成OceanBase数据库及其OCP Express管理平台的一站式部署,助力用户实现快速部署与应用。

[root@worker3 ob4-3]# cat /etc/redhat-release
CentOS Linux release 7.4.1708 (Core)
[root@worker3 ob4-3]# free -h
              total        used        free      shared  buff/cache   available
Mem:            27G        676M         18G         41M        8.6G         26G
Swap:          8.0G          0B        8.0G
[root@worker3 ob4-3]# 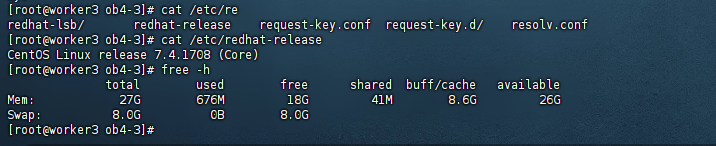
一、部署前系统调优
1、系统资源限制优化
操作系统参数调优,通过配置文件 /etc/security/limits.conf 在全局级别修改。OceanBase 数据库的进程涉及的限制包括线程最大栈空间大小(Stack)、最大文件句柄数(Open Files)和 core 文件大小 (Core File Size)。将会话级别的最大栈空间大小设置为 unlimited,最大文件句柄数设置为 655350,Core 文件大小设置为 unlimited。
[root@instance2 ~]# vim /etc/security/limits.conf
[root@instance2 ~]# ![]()
在 /etc/security/limits.conf 配置文件中添加以下内容:
root soft nofile 655350
root hard nofile 655350
* soft nofile 655350
* hard nofile 655350
* soft stack unlimited
* hard stack unlimited
* soft nproc 655360
* hard nproc 655360
* soft core unlimited
* hard core unlimited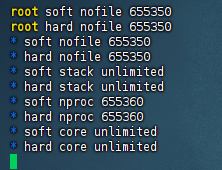
优化效果分析:
nofile参数提升可避免"Too many open files"错误nproc调整确保足够线程数支持高并发core设置为unlimited便于故障诊断
验证配置生效
退出当前会话,重新登录。执行以下命令,查看配置是否生效。
重新登录后检查
[root@instance2 ~]# ulimit -a
2、内核参数调优
2.1 虚拟内存优化
虚拟内存配置 vm.max_map_count进程可以拥有的虚拟内存区域数量,建议配置为 655360
[root@instance2 ~]# vim /etc/sysctl.conf
[root@instance2 ~]# vim /etc/sysctl.confsysctl -p
[root@instance2 ~]# sysctl -p
fs.aio-max-nr = 1048576
net.core.somaxconn = 2048
net.core.netdev_max_backlog = 10000
net.core.rmem_default = 16777216
net.core.wmem_default = 16777216
net.core.rmem_max = 16777216
net.core.wmem_max = 16777216
net.ipv4.ip_local_port_range = 3500 65535
net.ipv4.ip_forward = 0
net.ipv4.conf.default.rp_filter = 1
net.ipv4.conf.default.accept_source_route = 0
net.ipv4.tcp_syncookies = 0
net.ipv4.tcp_rmem = 4096 87380 16777216
net.ipv4.tcp_wmem = 4096 65536 16777216
net.ipv4.tcp_max_syn_backlog = 16384
net.ipv4.tcp_fin_timeout = 15
net.ipv4.tcp_max_syn_backlog = 16384
net.ipv4.tcp_tw_reuse = 1
net.ipv4.tcp_tw_recycle = 1
net.ipv4.tcp_slow_start_after_idle = 0
vm.swappiness = 0
vm.min_free_kbytes = 2097152
vm.max_map_count = 655360
sunrpc.tcp_max_slot_table_entries = 128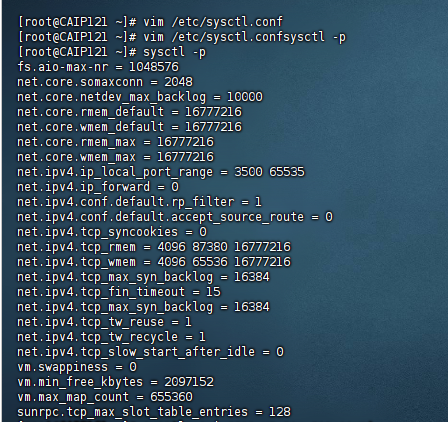
[root@instance2 ~]# sysctl -a | grep vm.max_map_count
sysctl: reading key "net.ipv6.conf.all.stable_secret"
sysctl: reading key "net.ipv6.conf.default.stable_secret"
sysctl: reading key "net.ipv6.conf.docker0.stable_secret"
sysctl: reading key "net.ipv6.conf.ens192.stable_secret"
sysctl: reading key "net.ipv6.conf.lo.stable_secret"
vm.max_map_count = 655360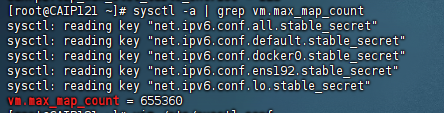
技术原理:max_map_count参数控制进程可拥有的内存映射区域数量,OceanBase作为内存密集型数据库需要更大值
2.2 文件句柄数调整
检查主机内核参数优化fs.file-max ≥ 6573688 整个系统能够打开的最大文件数量,是系统级别的限制,避免默认值过小造成限制。
[root@instance2 ~]# vim /etc/sysctl.conf
[root@instance2 ~]# sysctl -p
fs.aio-max-nr = 1048576
net.core.somaxconn = 2048
net.core.netdev_max_backlog = 10000
net.core.rmem_default = 16777216
net.core.wmem_default = 16777216
net.core.rmem_max = 16777216
net.core.wmem_max = 16777216
net.ipv4.ip_local_port_range = 3500 65535
net.ipv4.ip_forward = 0
net.ipv4.conf.default.rp_filter = 1
net.ipv4.conf.default.accept_source_route = 0
net.ipv4.tcp_syncookies = 0
net.ipv4.tcp_rmem = 4096 87380 16777216
net.ipv4.tcp_wmem = 4096 65536 16777216
net.ipv4.tcp_max_syn_backlog = 16384
net.ipv4.tcp_fin_timeout = 15
net.ipv4.tcp_max_syn_backlog = 16384
net.ipv4.tcp_tw_reuse = 1
net.ipv4.tcp_tw_recycle = 1
net.ipv4.tcp_slow_start_after_idle = 0
vm.swappiness = 0
vm.min_free_kbytes = 2097152
vm.max_map_count = 655360
sunrpc.tcp_max_slot_table_entries = 128
fs.file-max = 6573688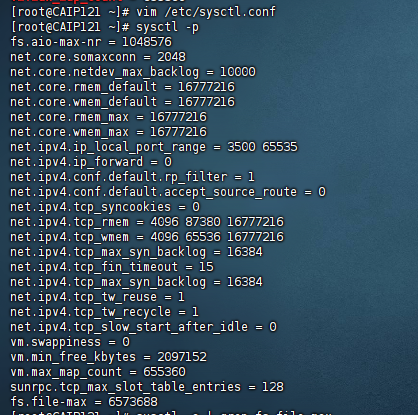
[root@instance2 ~]# sysctl -a | grep fs.file-max
fs.file-max = 6573688
sysctl: reading key "net.ipv6.conf.all.stable_secret"
sysctl: reading key "net.ipv6.conf.default.stable_secret"
sysctl: reading key "net.ipv6.conf.docker0.stable_secret"
sysctl: reading key "net.ipv6.conf.ens192.stable_secret"
sysctl: reading key "net.ipv6.conf.lo.stable_secret"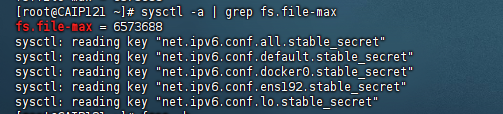
3、SSH连接优化
3.1 检查 UsePAM 配置
如果上述方法无效,可能是由于 UsePAM 配置未启用导致的。请按照以下步骤检查并启用 UsePAM:编辑 /etc/ssh/sshd_config 文件
[root@instance2 ~]# vim /etc/ssh/sshd_config
[root@instance2 ~]# ![]()
3.2 确保 UsePAM 配置为 yes
找到 UsePAM 行,确保其值为 yes。如果被注释,请取消注释:
UsePAM yes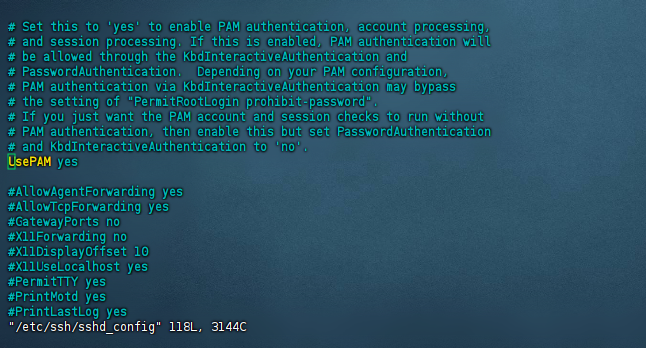
3.3 重启 SSH 服务
修改完成后,重启 SSH 服务以使配置生效:
[root@instance2 redo]# systemctl restart sshd
[root@instance2 redo]# ulimit -u
32000
验证配置是否生效
4、修改 max user processes 配置
按照建议中的步骤,手动修复 max user processes 参数:
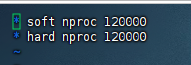
编辑 /etc/security/limits.d/nproc.conf 文件执行以下命令,将 max user processes 设置为推荐值:
[root@instance2 redo]# vim /etc/security/limits.d/nproc.conf
[root@instance2 redo]# ulimit -u 120000
[root@instance2 redo]# ulimit -u
120000
[root@instance2 redo]# ulimit -u
120000
验证配置是否生效修改完成后,退出当前会话并重新登录,然后执行以下命令查看 max user processes 的值:ulimit -u确保输出值为 120000。
二、部署 OceanBase 数据库
生产环境下,您需要进行环境和配置检查,具体操作请参考 部署前配置 章节。
1、环境准备
1.1 资源要求
| 部署类型 | 资源 | 推荐资源 |
|---|---|---|
| 数据库、OCP Express、OBAgent组件 | 32vCPU/36GB内存/162GB磁盘 | 16GB+内存以上 |
1.2 环境配置
- Java 环境要求
部署 OCP Express 前需安装 JDK1.8:
  # 示例:验证 Java 环境
  [root@worker3 ~]# java -version
openjdk version "1.8.0_322"
OpenJDK Runtime Environment (build 1.8.0_322-b06)
OpenJDK 64-Bit Server VM (build 25.322-b06, mixed mode)
[root@worker3 ~]# 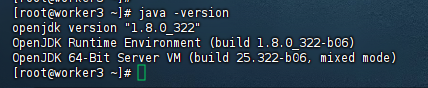
二、软件准备
1、部署方式选择
| 方式 | 特点 | 适用场景 |
|---|---|---|
| 在线部署 | 需外网访问,自动下载安装包 | 网络通畅环境 |
| 离线部署 | 需提前上传安装包到本地镜像库 | 无外网环境 |
使用 obd 图形化部署 OceanBase 数据库时,可以选择在线部署或离线部署两种部署方式。
在线部署:obd 所在机器需保证能访问外部网络,无需提前配置部署所需安装包,部署过程中 obd 会从远程镜像仓库获取部署所需安装包。
离线部署:部署过程中无需访问外部网络,您需提前将部署所需安装包上传至 obd 本地镜像库。选择离线部署时推荐直接下载所需版本的 OceanBase All in One 安装包。
2、 离线部署步骤
2.1 下载 All-in-One 安装包
当您选择离线部署时,可参考本节命令下载并安装 OceanBase All in One。
您可从 OceanBase 软件下载中心 下载最新的 OceanBase All in One,并将其复制到中控机中。执行如下命令解压并安装:

[root@worker3 ob4-3]# ls
oceanbase-all-in-one-4.3.5_20250115.el7.x86_64.tar.gz
[root@worker3 ob4-3]# tar -xzf oceanbase-all-in-one-4.3.5_20250115.el7.x86_64.tar.gz
[root@worker3 ob4-3]# ls
oceanbase-all-in-one  oceanbase-all-in-one-4.3.5_20250115.el7.x86_64.tar.gz
[root@worker3 ob4-3]# 
2.2 执行 install.sh 安装
[root@worker3 ob4-3]# cd oceanbase-all-in-one/
[root@worker3 oceanbase-all-in-one]# cd bin/
[root@worker3 bin]# ls
env.sh  install.sh  uninstall.sh
[root@worker3 bin]# ./install.sh 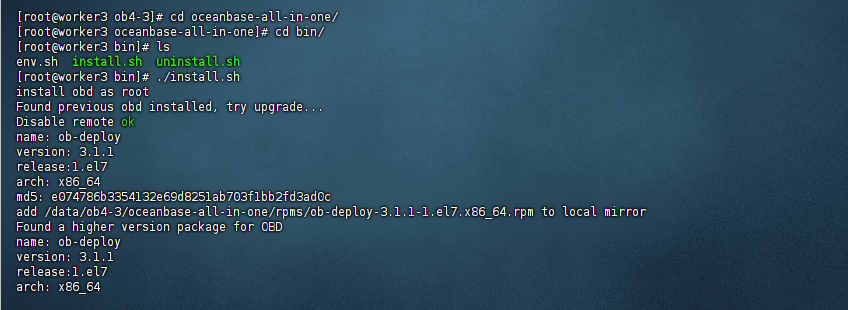
add auto set env logic to profile: /root/.bash_profile

#########################################################################################
 Install Finished
=========================================================================================
Setup Environment:              source ~/.oceanbase-all-in-one/bin/env.sh
Quick Start:                    obd demo
Use Web Service to install:     obd web
Use Web Service to upgrade:     obd web upgrade
More Details:                   obd -h
=========================================================================================
[root@worker3 bin]#
[root@worker3 bin]# source ~/.oceanbase-all-in-one/bin/env.sh
[root@worker3 bin]# 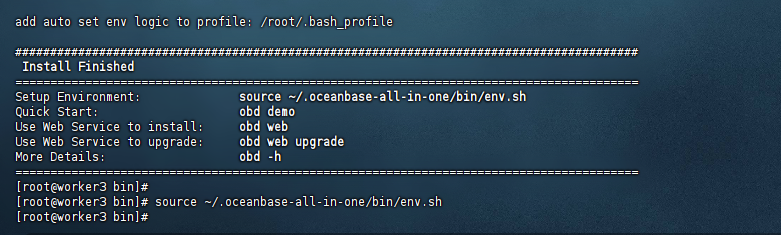
2.3 查看 obd --version 版本
本文以 obd V3.1.1 为例提供操作指导。不同 obd 版本的操作界面可能不同,请以实际界面为准。更多 obd 相关内容请参见 obd 文档。
[root@worker3 ~]# obd --version
OceanBase Deploy: 3.1.1
REVISION: 94b5853a18ad1ad09d5afc30d9edb44643dd488c
BUILD_BRANCH: HEAD
BUILD_TIME: Jan 06 2025 11:35:49OURCE
Copyright (C) 2025 OceanBase
License Apache 2.0: Apache version 2 or later <https://www.apache.org/licenses/LICENSE-2.0>.
This is free software: you are free to change and redistribute it.
There is NO WARRANTY, to the extent permitted by law.
[root@worker3 ~]# 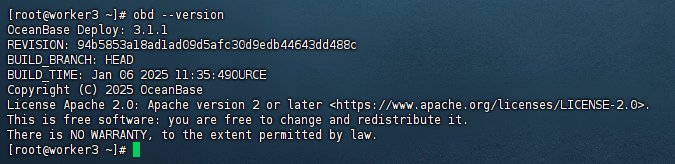
三、图形化部署流程
1. 启动部署界面
命令行执行 obd web 命令启动图形化界面,单击输出的地址访问图形化界面。
[root@worker3 bin]# obd web
start OBD WEB in 0.0.0.0:8680
please open http://192.168.2.12:8680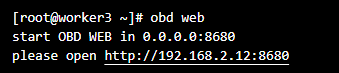
图形化界面默认使用 8680 端口,您可使用 obd web -p

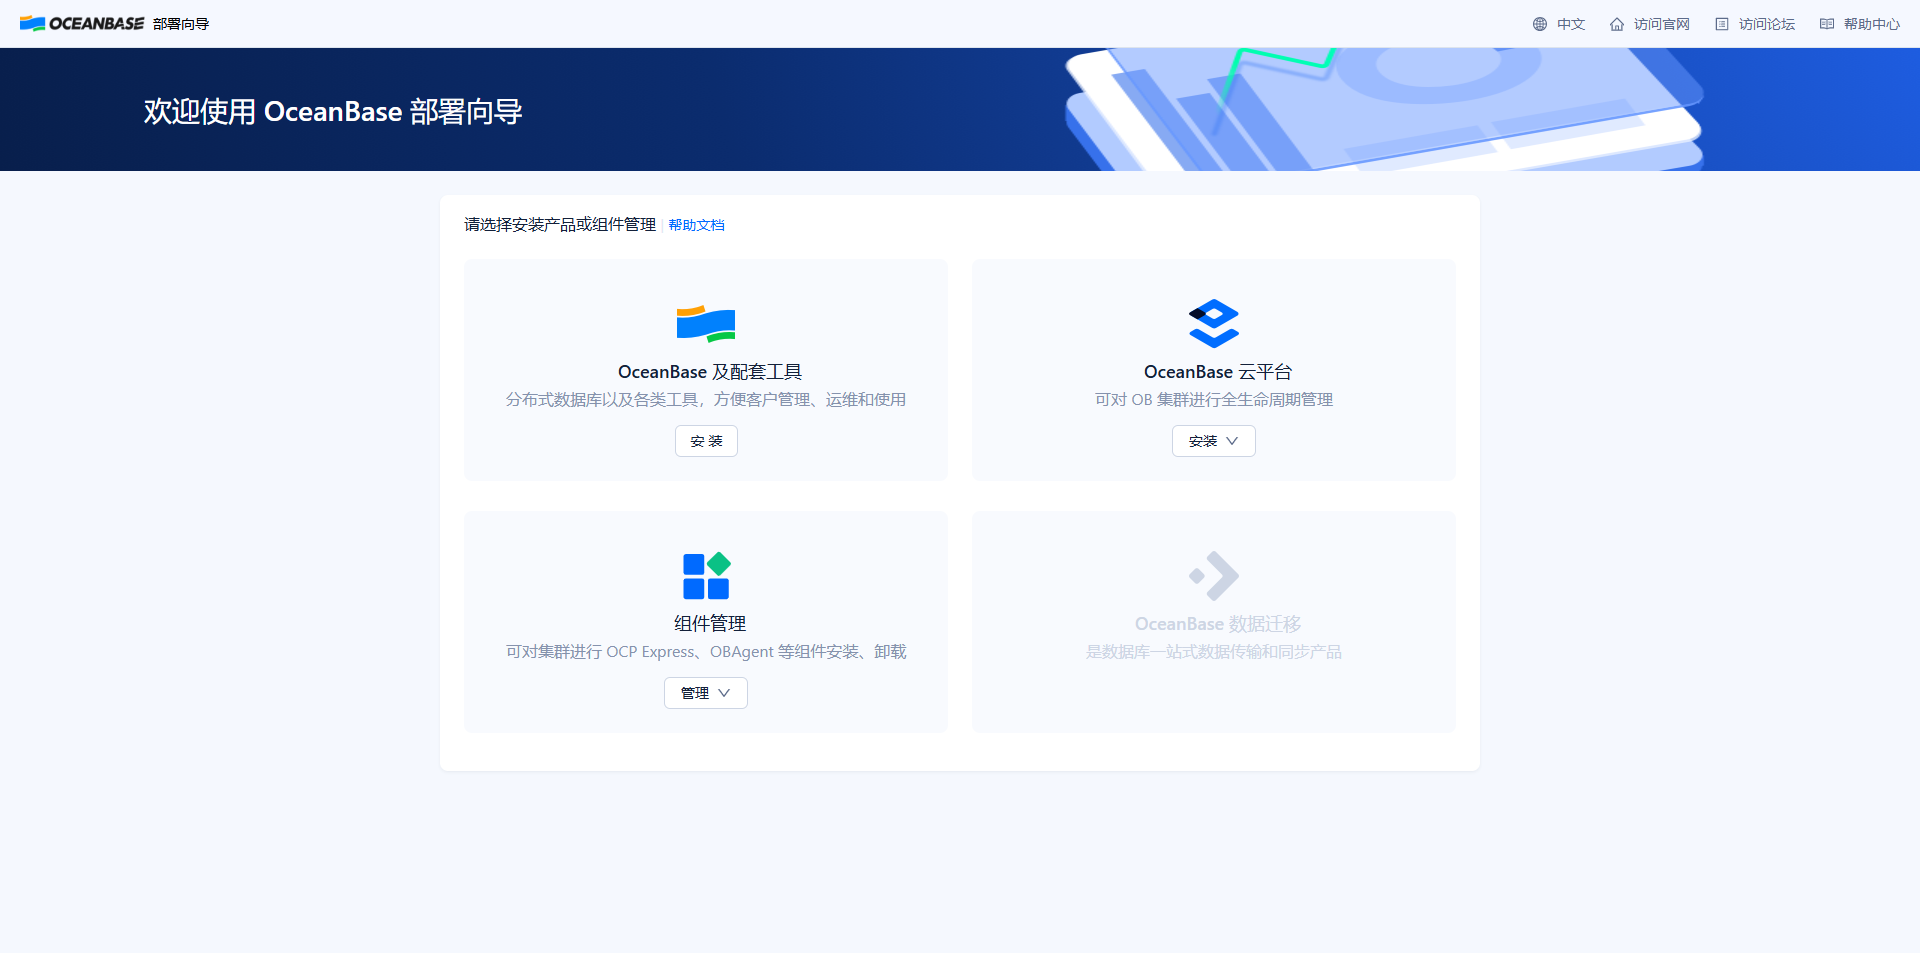
在图形化界面中单击 开启体验之旅,在显示的 欢迎使用 OceanBase 部署向导 界面选择 OceanBase 及配套工具 模块,单击 安装 后进入 OceanBase 数据库部署界面。
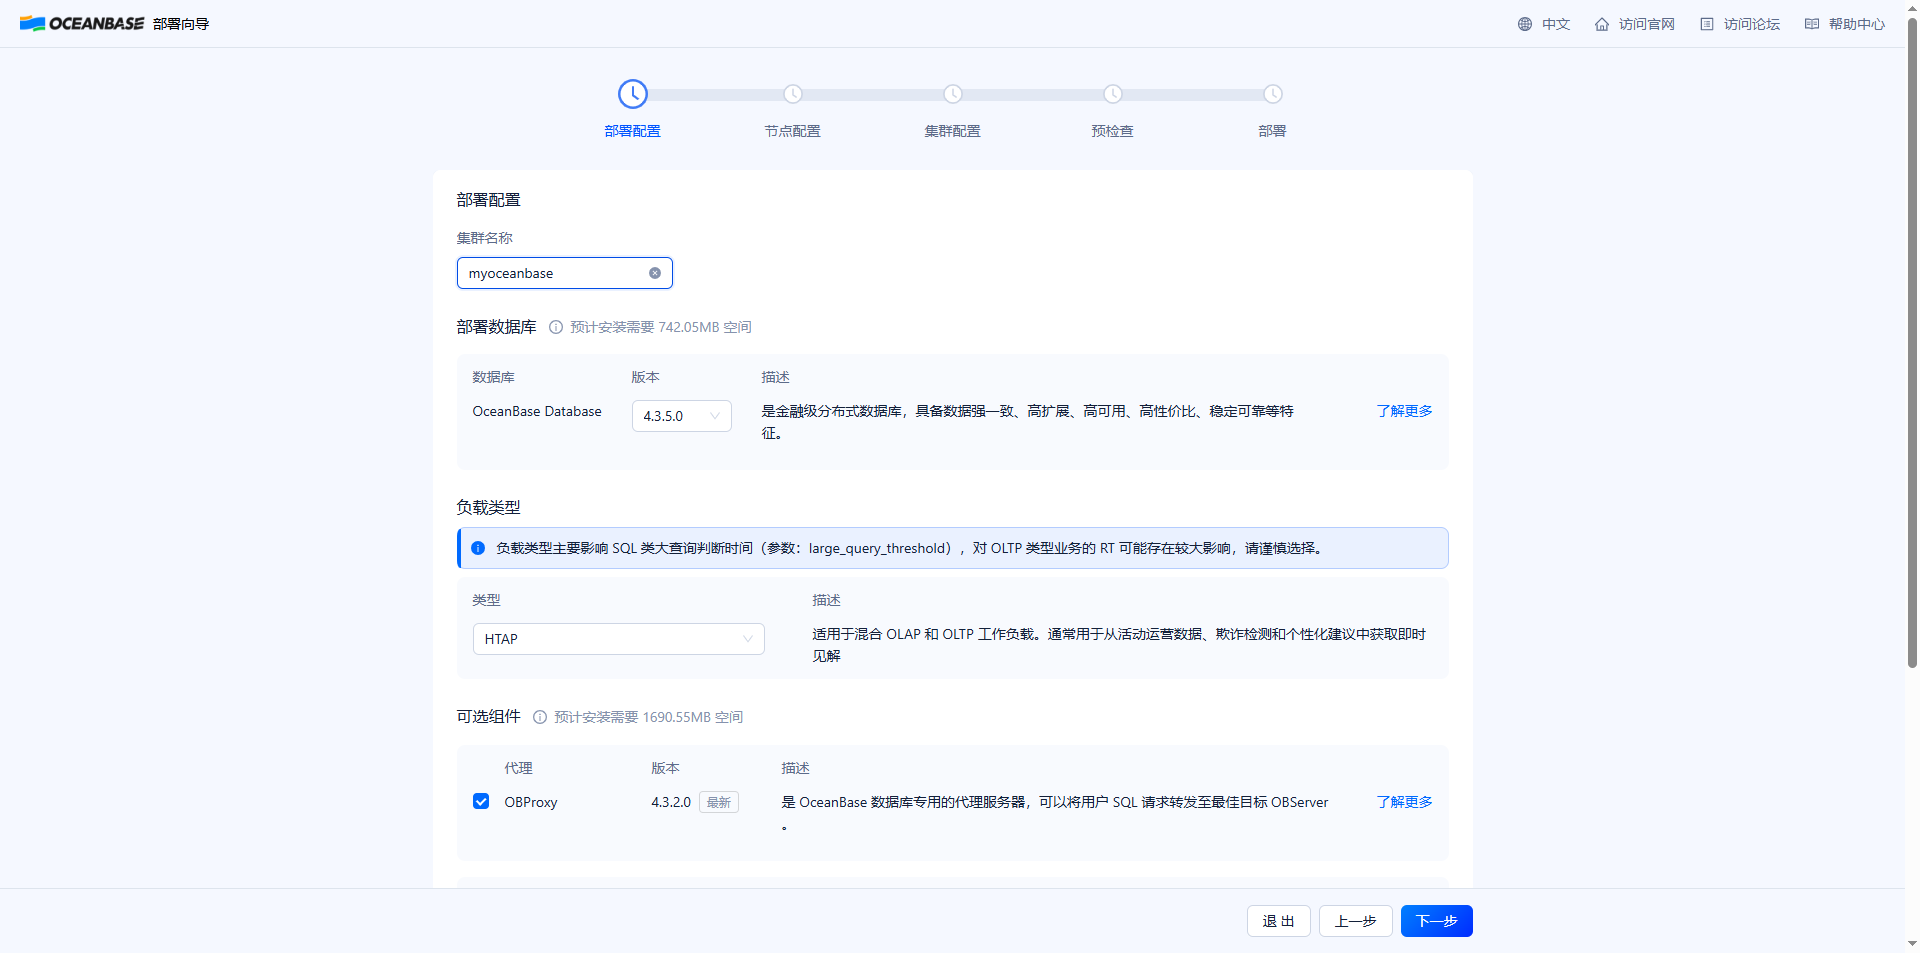
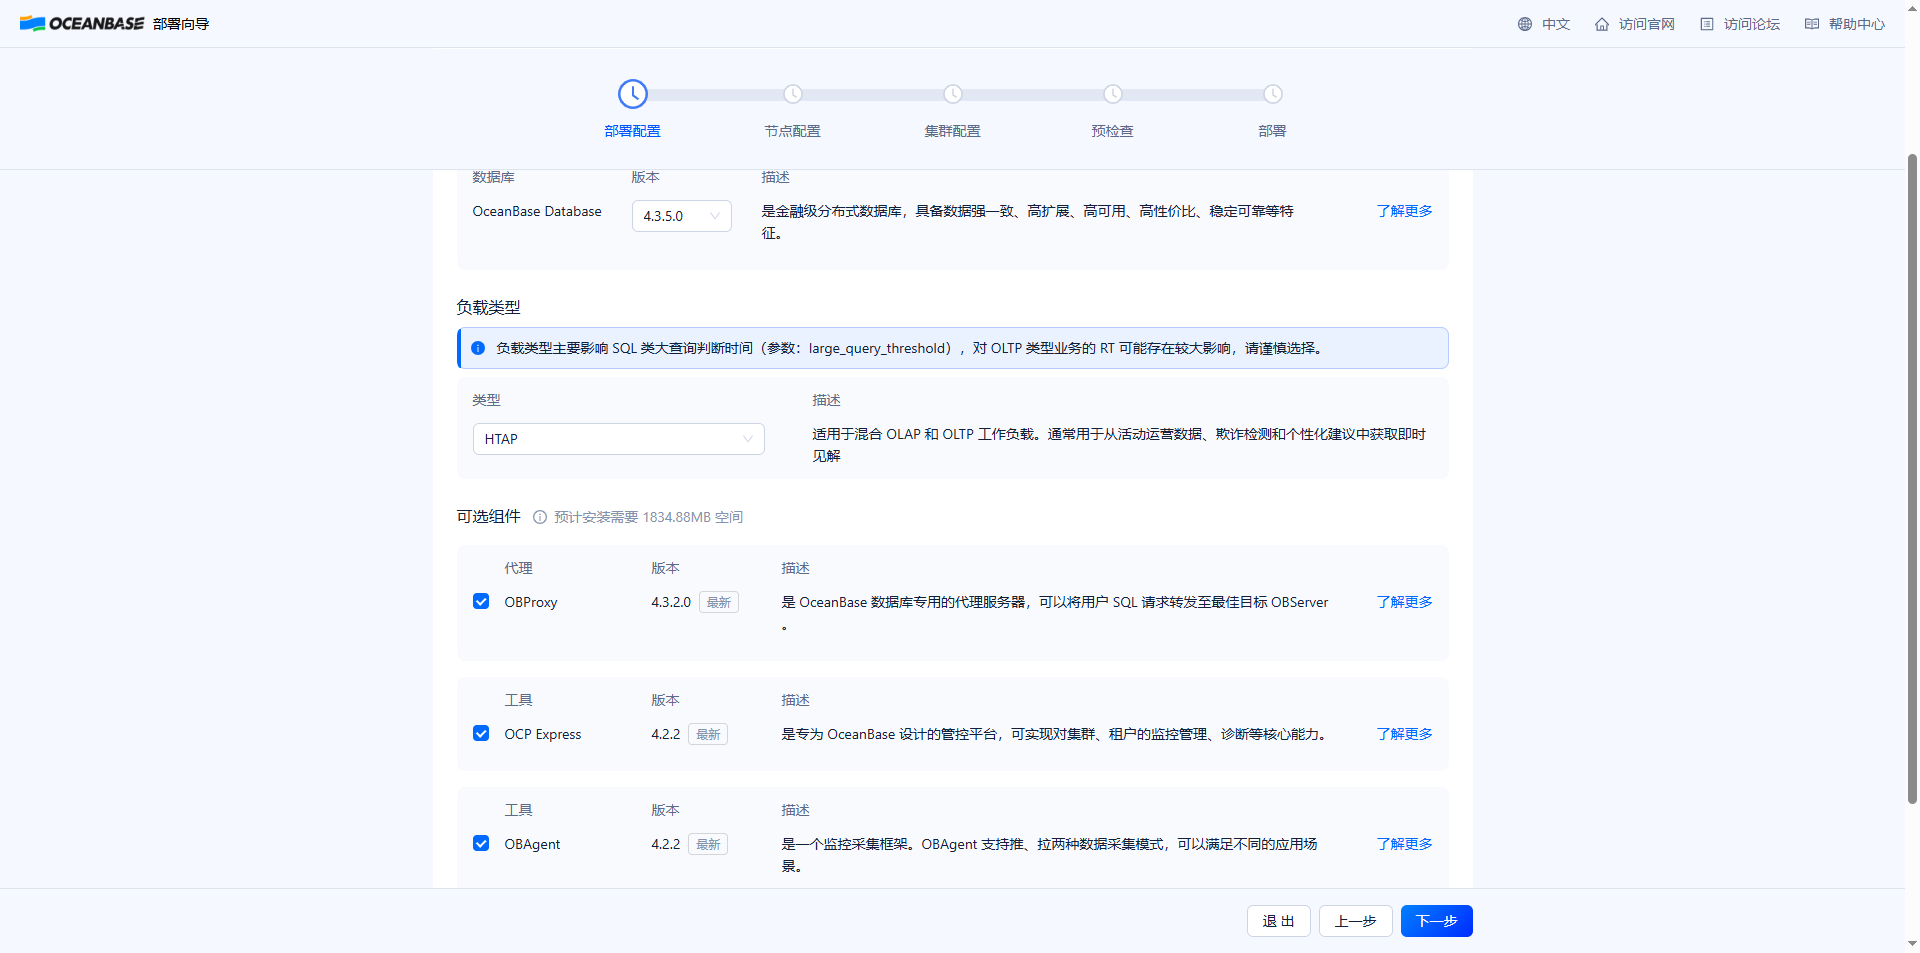
2. 部署配置
| 模块 | 配置说明 |
|---|---|
| 集群名称 | 唯一名称,如 myoceanbase |
| 负载类型 | TP/AP/HTAP(按场景选择) |
| 组件选择 | 默认含 OBProxy,OCP Express 需勾选 OBAgent |
您可在 部署配置 界面配置集群名称,负载类型和部署组件,部署配置 界面内容如下。
部署数据库 单击 版本 下的下拉框可自行选择 OceanBase 数据库的版本,单击对应组件后的 了解更多 可跳转查看对应组件的文档介绍。负载类型 单击 类型 下的下拉框可自行选择 OceanBase 集群的负载类型,可切换不同类型查看对应 描述,了解各类型的适用场景。
3. 组件节点
| 组件 | 节点要求 |
|---|---|
| OCP Express | 单节点,可复用 OBServer IP |
| OBProxy | 多节点,支持新增 IP |
| obconfigserver | 多节点需配置负载均衡 |
可选组件 默认仅勾选 OBProxy 组件,您可通过单击 可选组件 下对应组件前的勾选框设置是否部署对应组件,组件版本固定为最新版本,单击对应组件后的 了解更多 可跳转查看对应组件的文档介绍。勾选 OCP Express 组件时会自动勾选 OBAgent 组件,取消勾选 OBAgent 组件时会自动取消勾选 OCP Express 组件。
配置完成之后单击 下一步 可进入到 节点配置 页面。
4. 节点配置
您可在 节点配置 界面配置数据库和组件节点,部署用户以及软件安装路径,节点配置 界面内容如下。
数据库节点
| 参数 | 要求 |
|---|---|
| Zone 名称 | 2~32字符,字母开头 |
| OBServer 节点 | 多个 IP,非 127.0.0.1 |
| RootServer | 从 OBServer 中选择一个 IP |
| 模块 参数 说明 | |
| 数据库节点配置 Zone 名称 配置 OceanBase 数据库中的 Zone 名称,可自定义。Zone 名称需以英文字母开头,英文或数字结尾,可包含英文、数字和下划线且长度在 2~32 个字符之间。部署多 Zone 的 OceanBase 集群必须有一个 Zone 与主 Zone 的 Region 相同。可单击 + 新增 Zone 或对应 Zone 后的删除图标新增或删除 Zone。 |
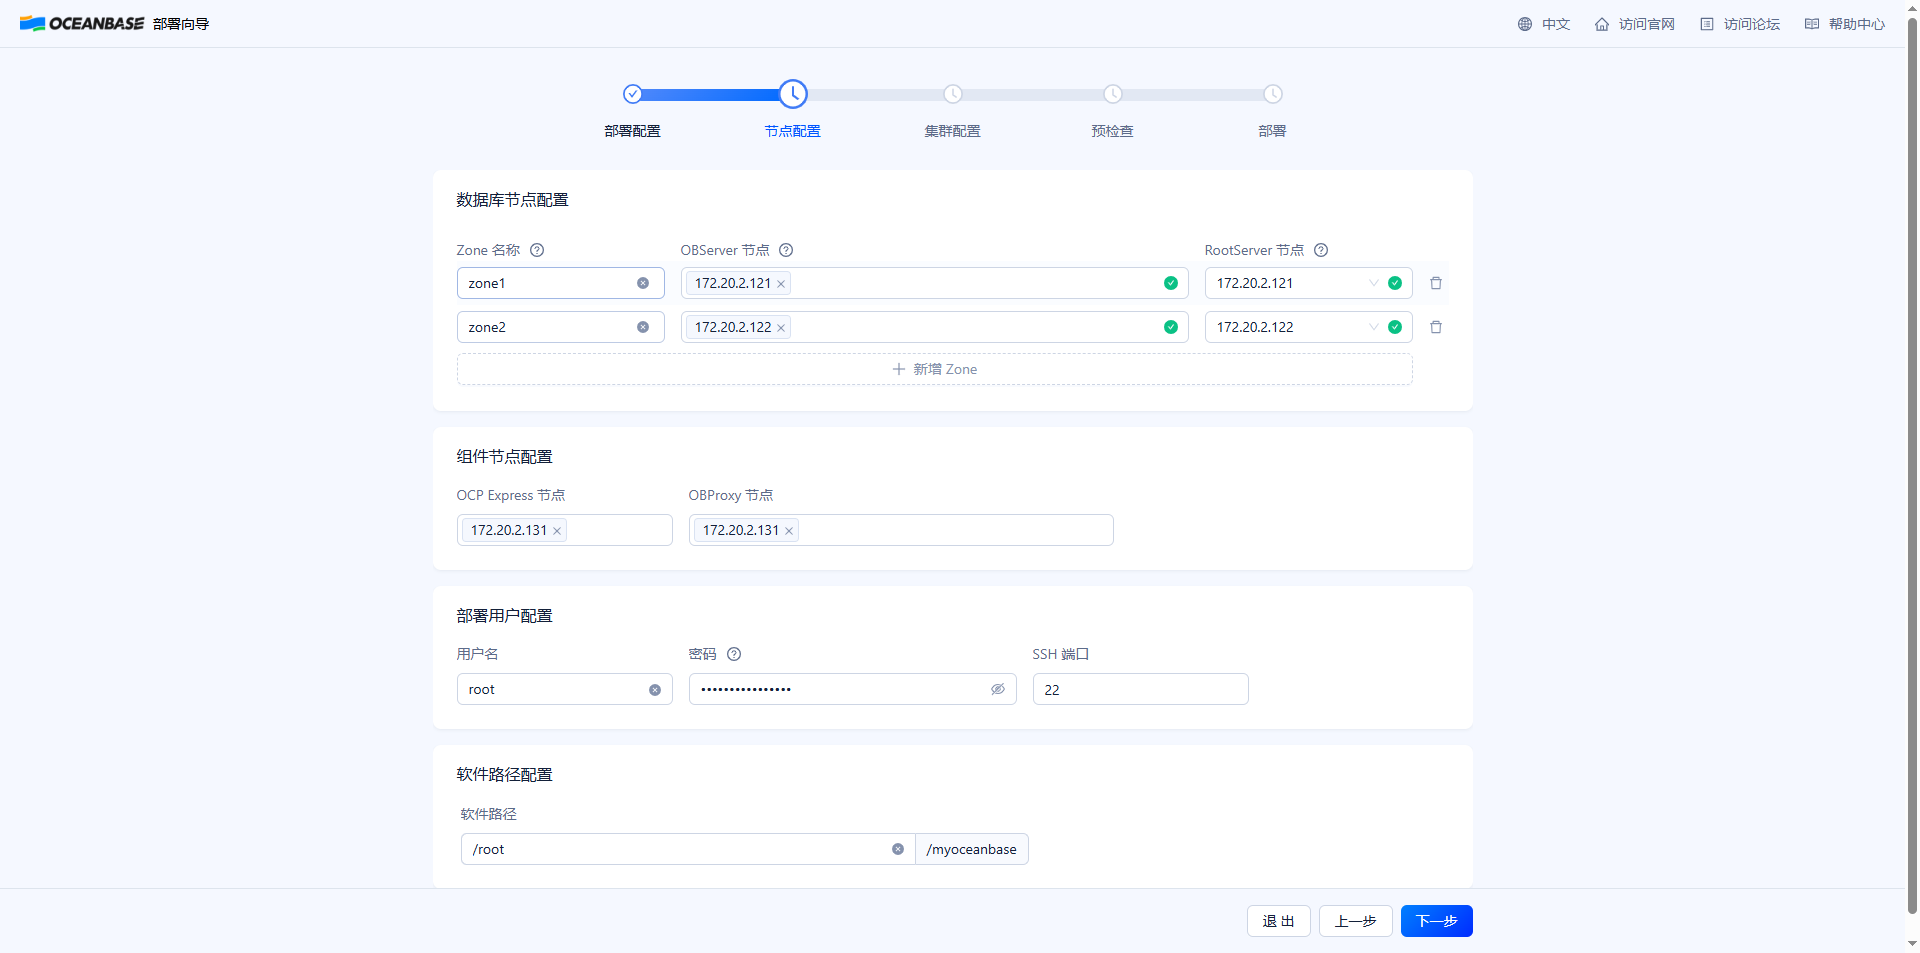
部署用户配置 用户名 配置部署 OceanBase 集群的用户名,默认为当前进程的启动用户,支持自定义用户名。
配置完成之后单击 下一步 可进入到 集群配置 页面。
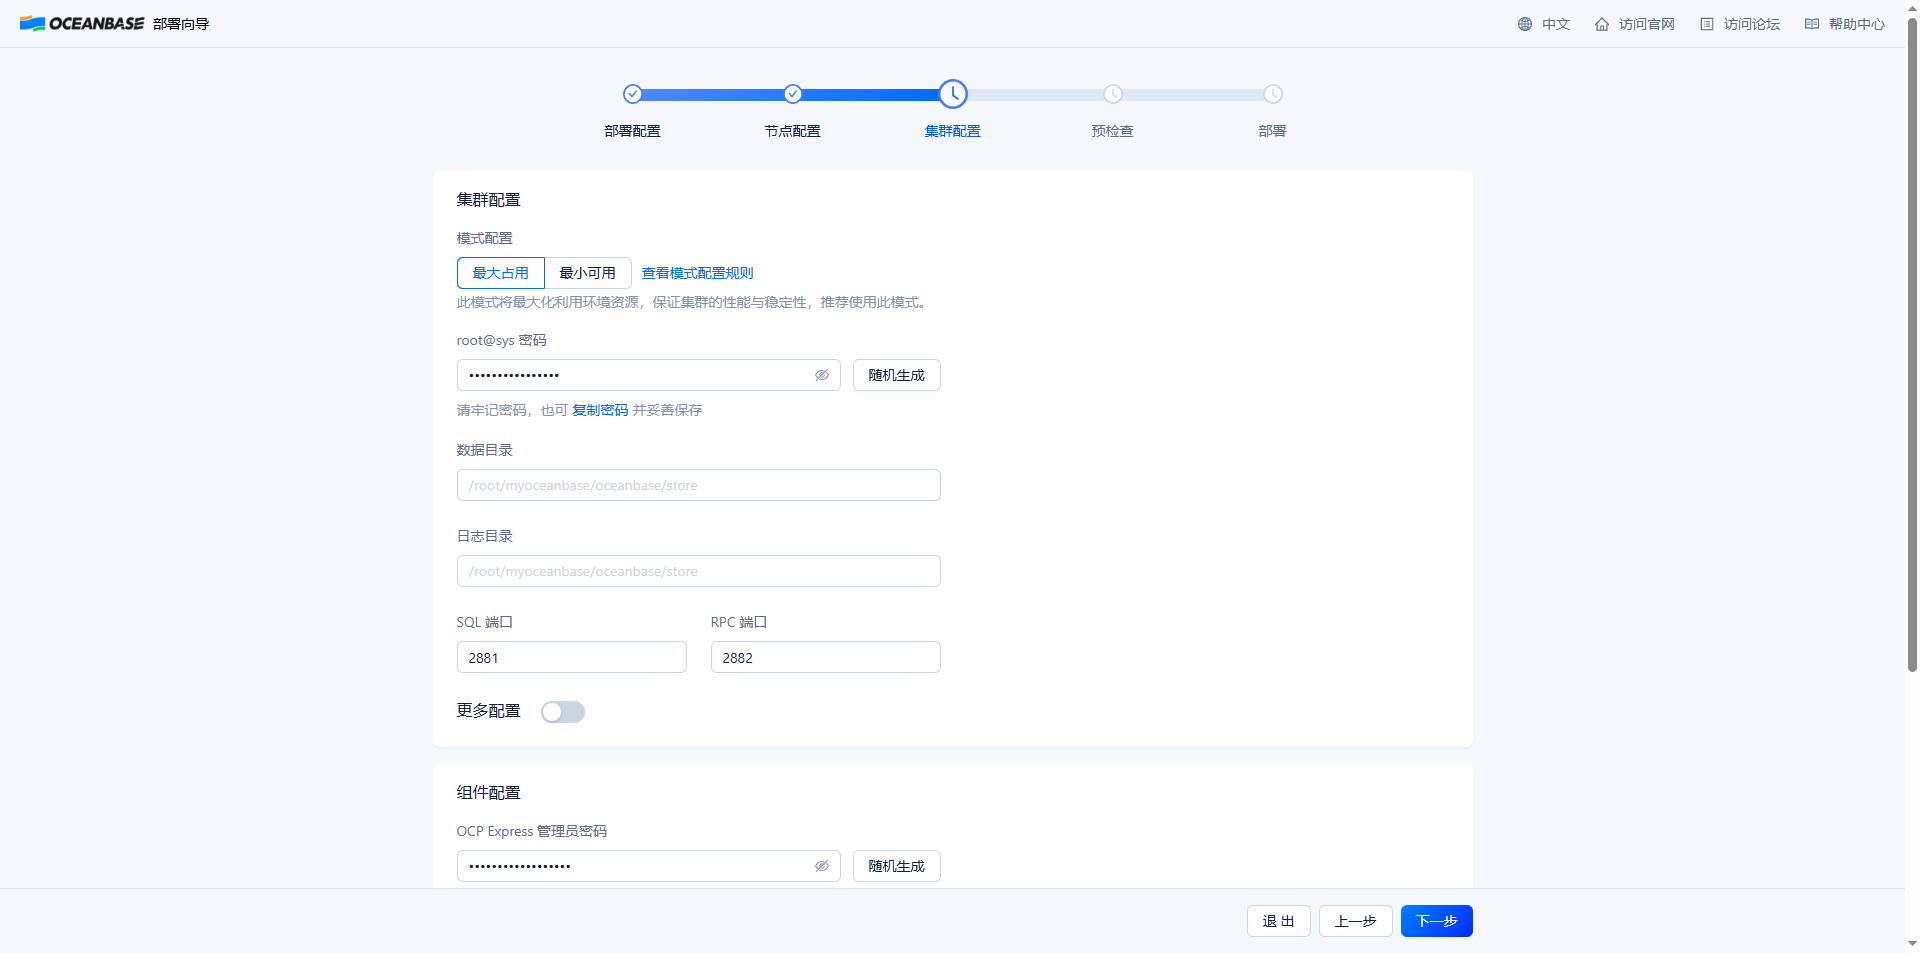
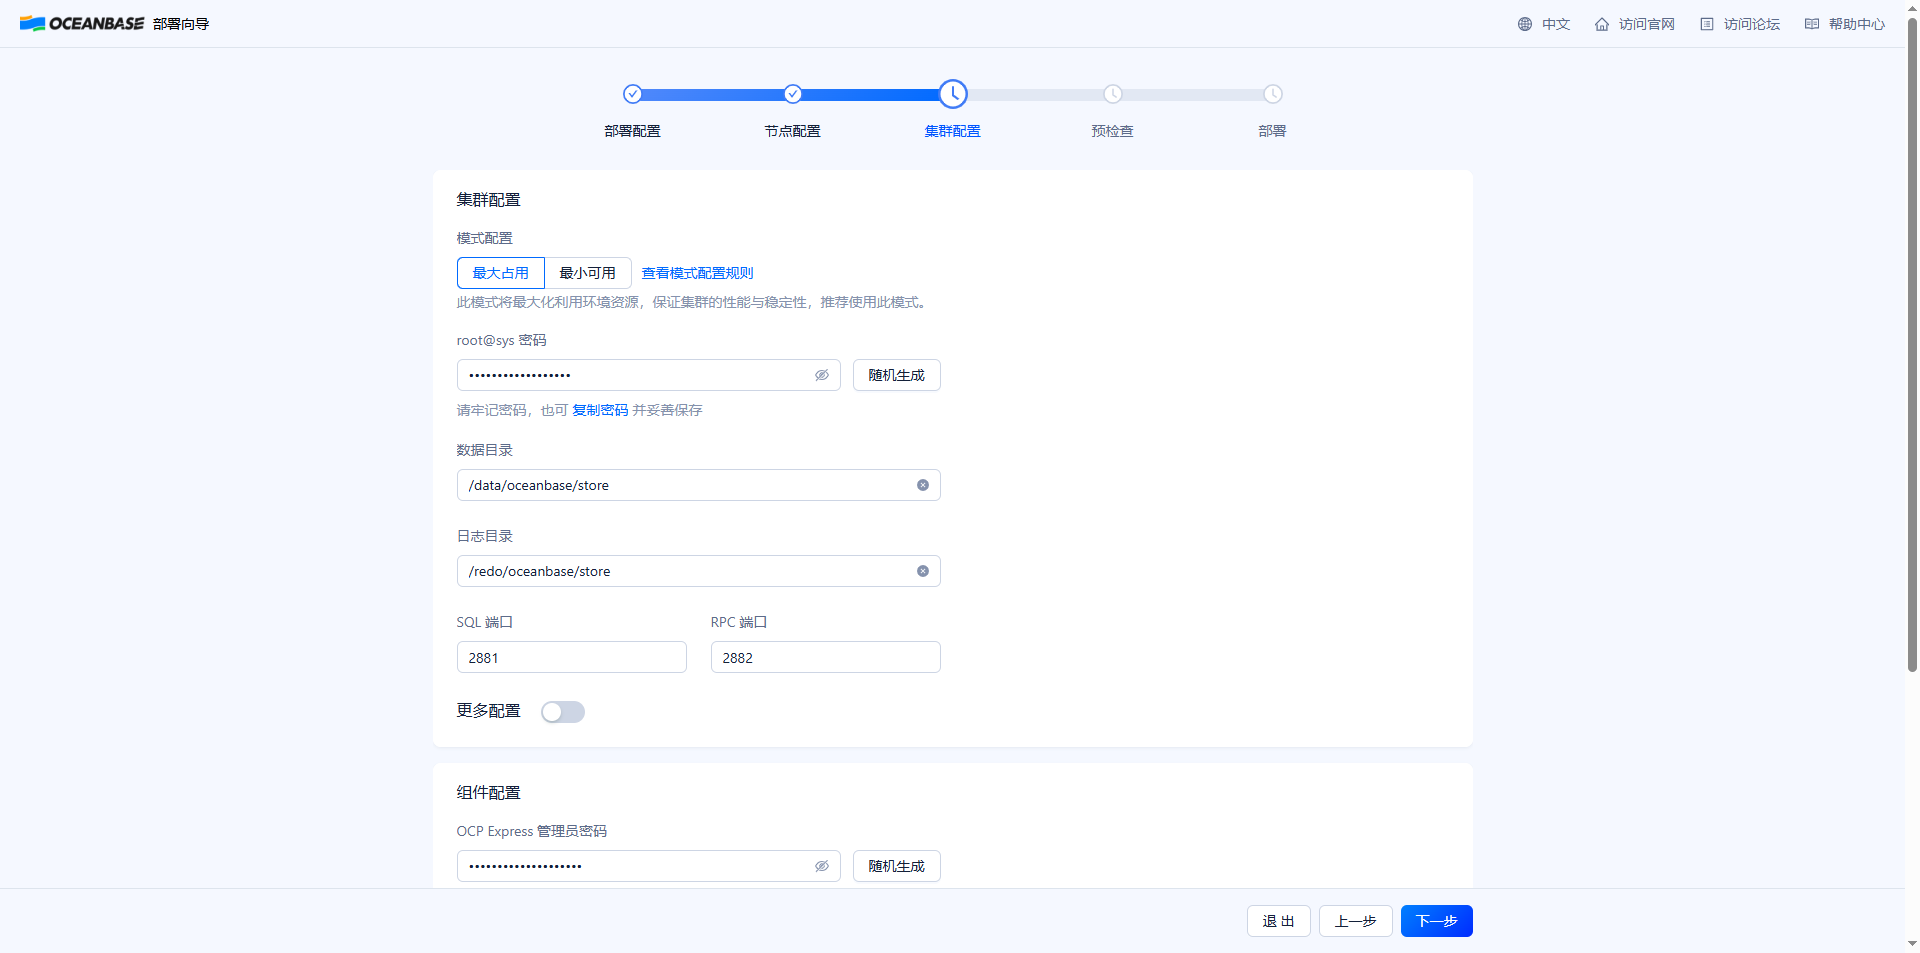
5. 集群配置
| 模块 | 配置项 | 默认值/要求 |
|---|---|---|
| root@sys 密码 | 需包含 3 种字符类型 | 随机生成或自定义 |
| 数据目录 | 绝对路径,目录需为空 | ~/myoceanbase/data |
| SQL 端口 | 1025~65535 | 2881 |
| RPC 端口 | 1025~65535 | 2882 |
集群配置 界面可对集群进行配置,包括系统租户的管理员用户(root@sys)密码、数据和日志目录、数据库及各组件的端口和参数配置等。您可通过在 更多配置 中设置 scenario 配置项来设置集群负载类型,未配置的情况下默认 scenario 为 htap。
6. 组件端口配置
| 组件 | 端口类型 | 默认值 |
|---|---|---|
| OBProxy | SQL 端口 | 2883 |
| OCP Express | HTTP 端口 | 8180 |
| OBAgent | 监控端口 | 8088 |
OCP Express 端口 访问 OCP Express 的 HTTP 端口,默认为 8180,可自定义设置(仅支持 102565535 范围),需确保设置的端口未被占用。更多配置 可单击 更多配置 后的按钮查看对应的组件参数,可使用自动分配的值进行配置,也可自定义各个参数。说明若在 节点配置 中的 obconfigserver 节点 处配置了多个节点,您需打开 更多配置 按钮,并配置 vip_address 和 vip_port,否则预检查时会报错。
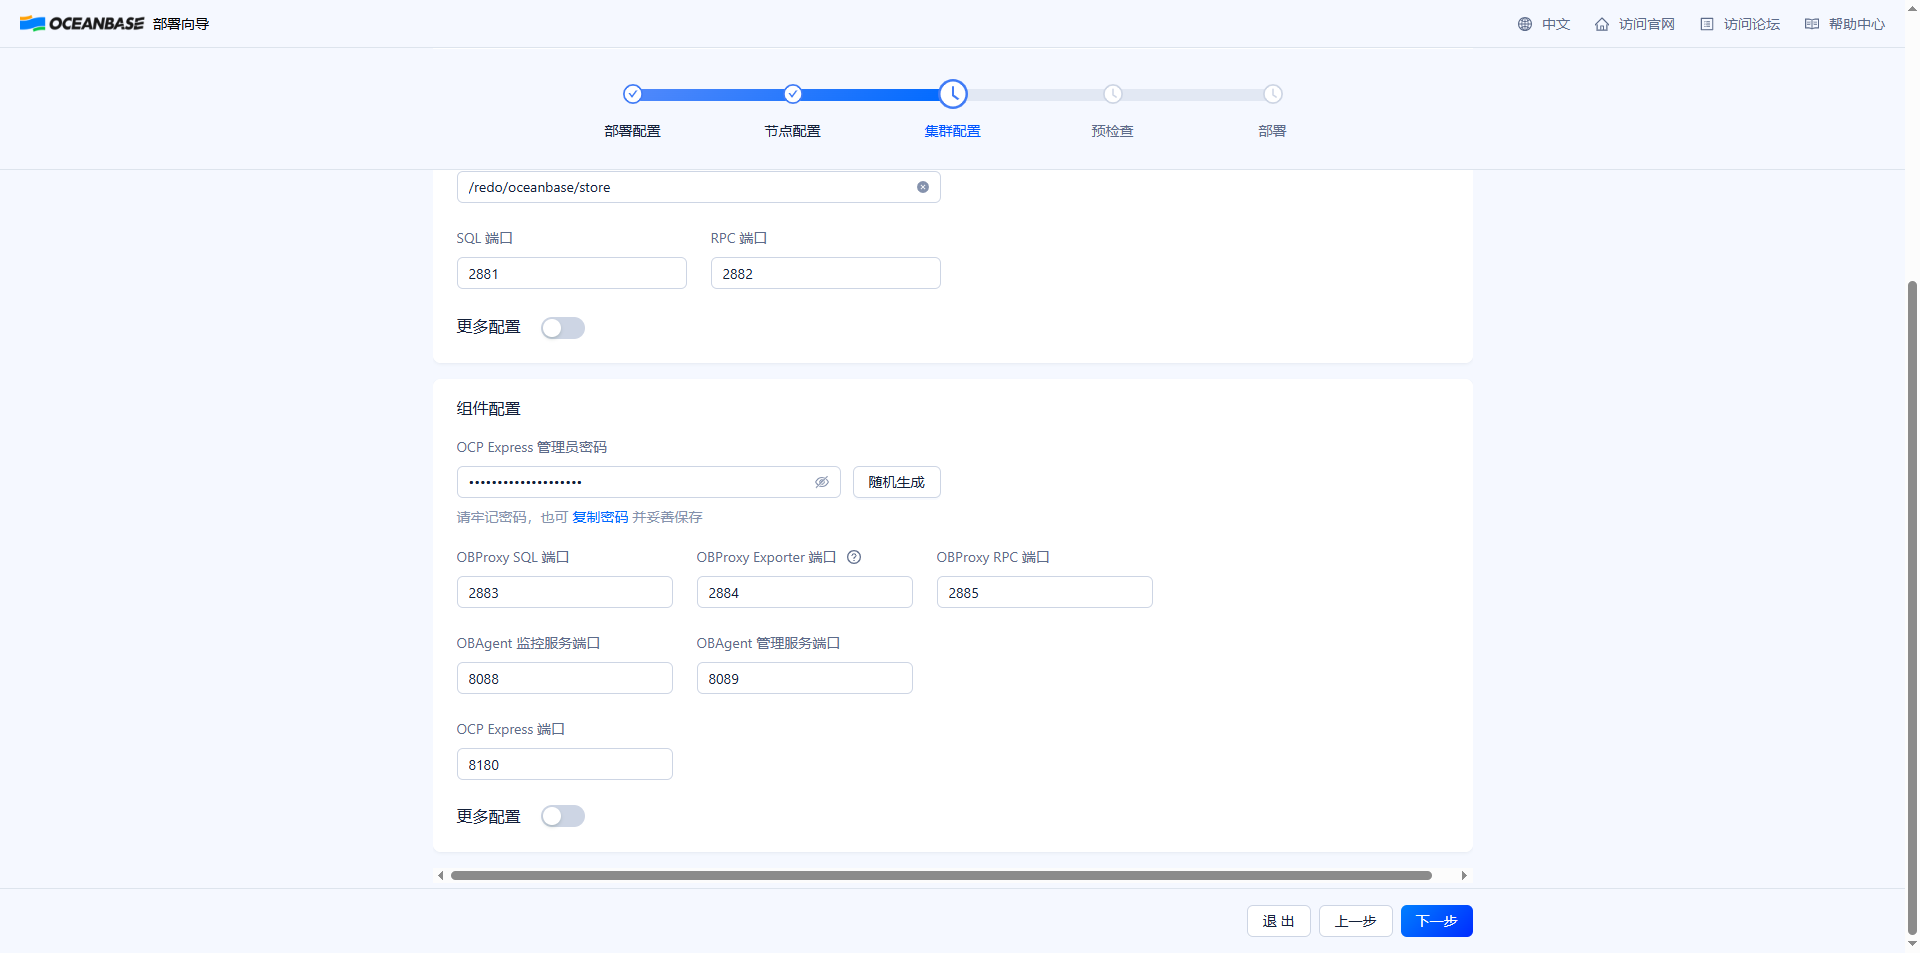
全部配置完成后,单击 下一步 即可进入到 预检查 页面。

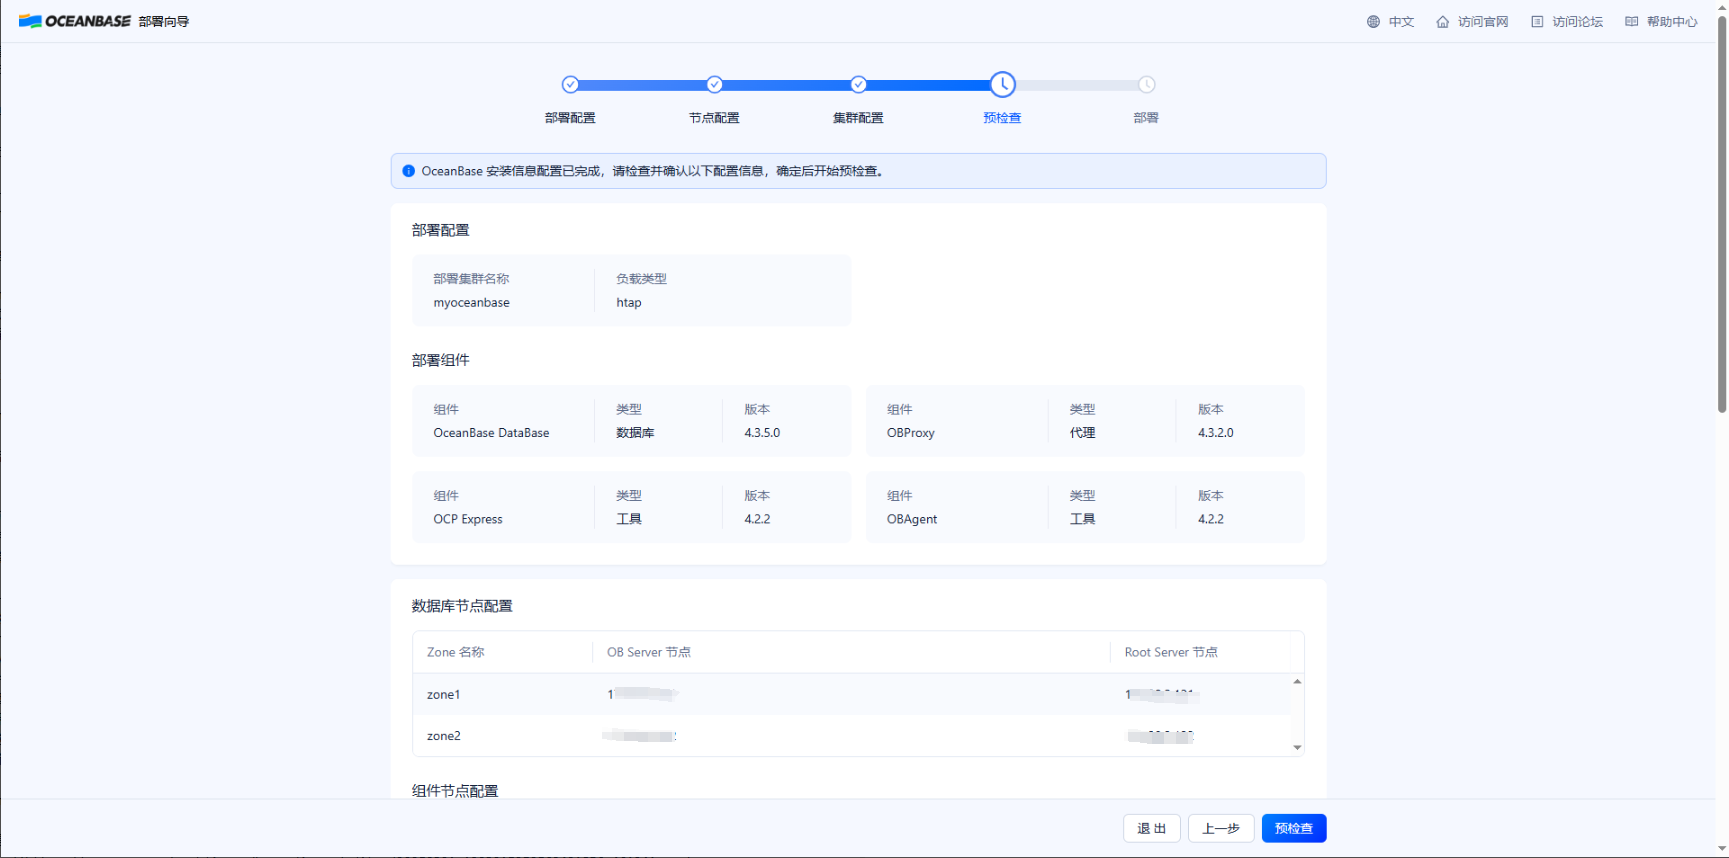
7. 预检查与部署
预检查在 预检查 页面查看所有配置信息,若发现问题可单击 上一步 进行修改;确认无误后,单击 预检查 进行检查。
- 若预检查报错,您可根据页面建议选择 自动修复(针对可自动修复的检查项);
- 手动参考错误码文档解决其他问题,参考文档自行修改。所有报错修改后,可单击 重新检查 再次进行预检查。
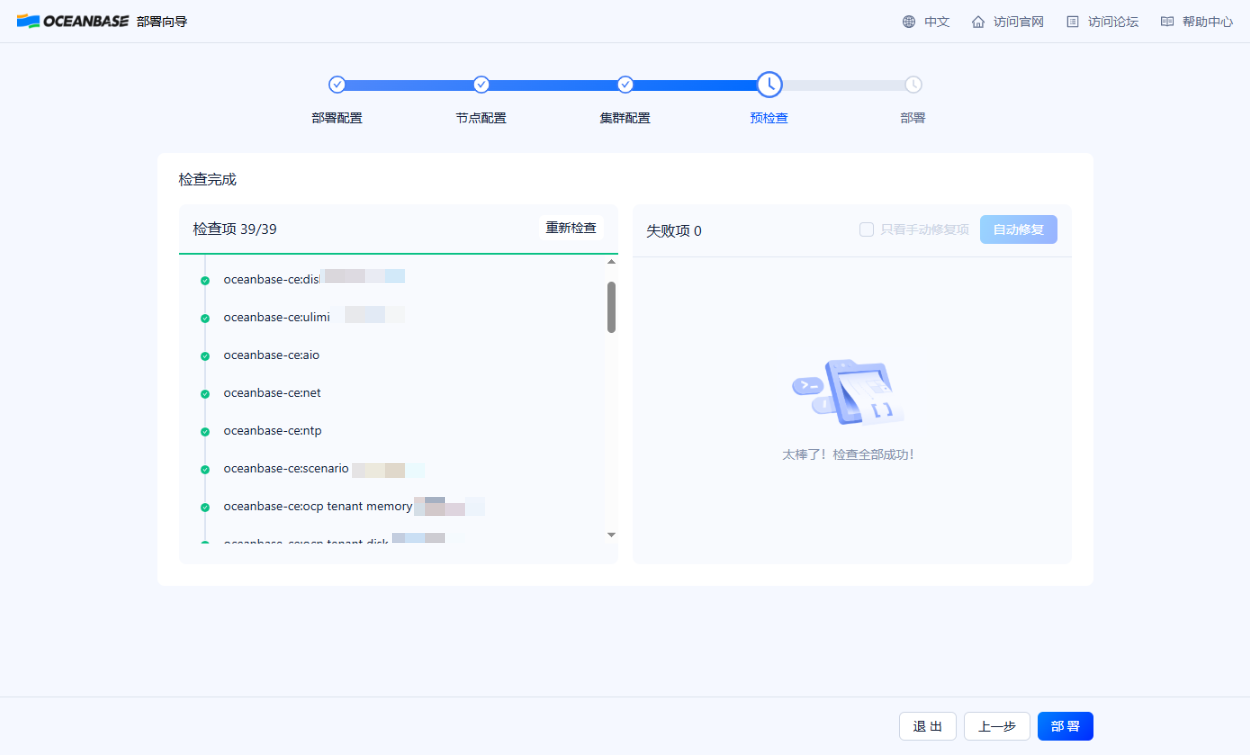
预检查通过后,单击 部署 即可开始 OceanBase 数据库的部署。
8. 执行部署
成功后将显示连接信息:
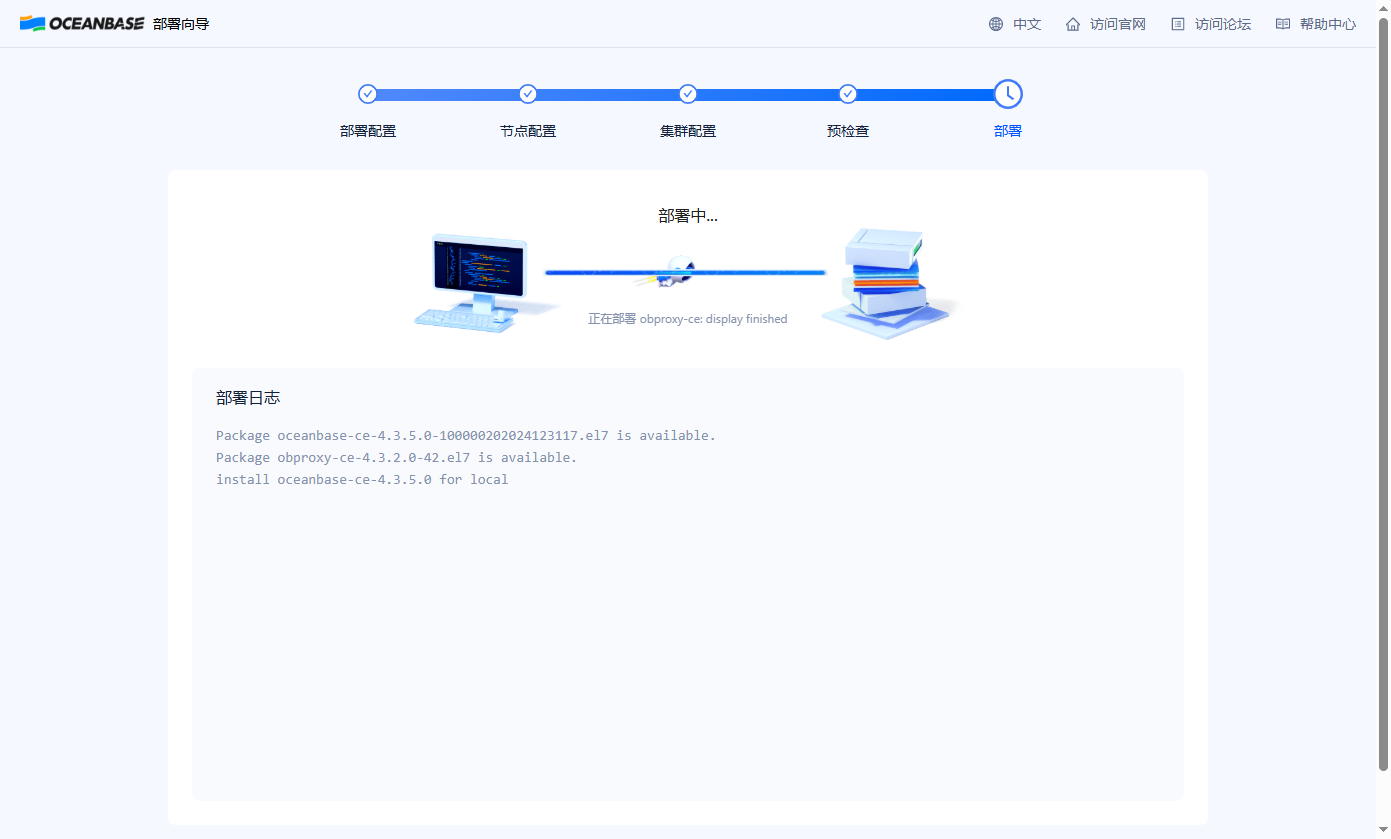
部署成功后可复制显示的连接串连接到对应组件。在黑屏界面执行 OceanBase 数据库组件后的连接串会以 root@sys 用户连接到 OceanBase 集群,执行 OBProxy 组件后的连接串会以 root@proxysys 用户连接到 ODP。
obclient -h192.168.2.12 -P2881 -uroot -p'########' -Doceanbase -A
obclient -h192.168.2.12 -P2883 -uroot@proxysys -p'########' -Doceanbase -A 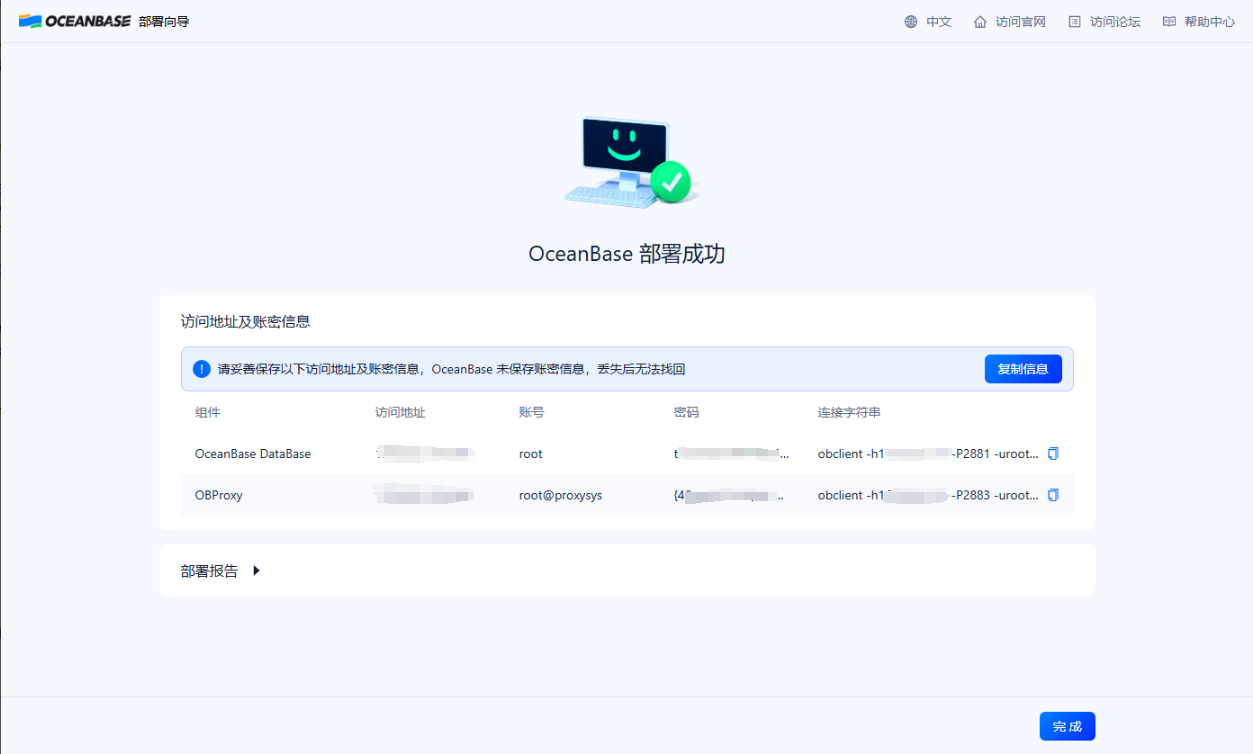
也可以单击《一键复制》,在复制保存 OceanBase 集群的所有账密信息后,单击 完成 退出部署程序。
[
    {
        "component": "oceanbase-ce",
        "access_url": "192.168.2.12:2881",
        "user": "root",
        "password": "########",
        "connect_url": "obclient -h192.168.2.12 -P2881 -uroot -p'########' -Doceanbase -A"
    },
    {
        "component": "obproxy-ce",
        "access_url": "192.168.2.12:2883",
        "user": "root@proxysys",
        "password": "########",
        "connect_url": "obclient -h192.168.2.12 -P2883 -uroot@proxysys -p'########' -Doceanbase -A \n"
    },
    {
        "component": "ocp-express",
        "access_url": "192.168.2.12:8180",
        "user": "admin",
        "password": "########",
        "connect_url": "http://192.168.2.12:8180"
    }
]
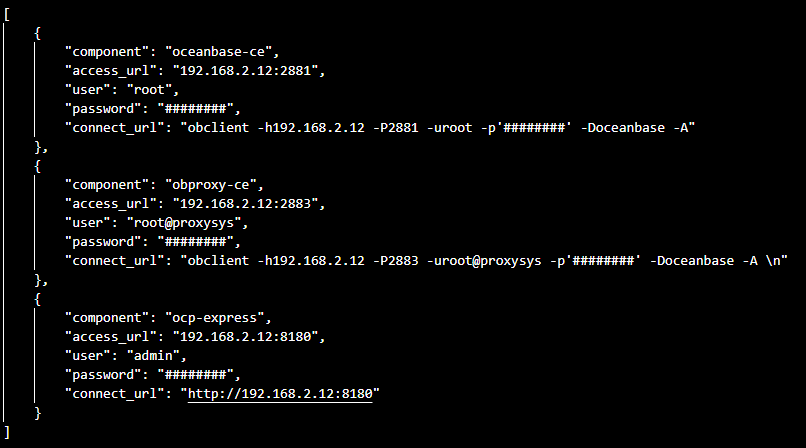
单击输出的 OCP Express 组件的连接串可跳转到 OCP Express 的登录界面,通过部署界面展示的账号密码登录并修改密码后可使用图形化界面管理集群。

注意如需部署多个集群,您需在图形化界面单击 完成 结束当前 obd 进程后才可再次执行 obd web 命令进行下一集群的部署。
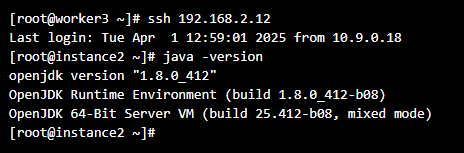
9. Java 环境验证
由于 obd 是通过远程执行脚本部署 OCP Express,所以需要通过 SSH 方式验证 Java 环境,直接在机器上执行 java -version 可能无效。
您可在任意一台网络与 OCP Express 所在节点连通的机器上执行如下命令进行验证。
[root@worker3 ~]# ssh 192.168.2.12
Last login: Tue Apr  1 12:59:01 2025 from 10.9.0.18
[root@instance2 ~]# java -version
openjdk version "1.8.0_412"
OpenJDK Runtime Environment (build 1.8.0_412-b08)
OpenJDK 64-Bit Server VM (build 25.412-b08, mixed mode)
[root@instance2 ~]#
输出结果
四、验证与连接
1. 连接 OceanBase 数据库
[root@worker3 ~]# obclient -h192.168.2.12 -P2881 -uroot@sys -p
Enter password:
Welcome to the OceanBase.  Commands end with ; or \g.
Your OceanBase connection id is 3221506855
Server version: OceanBase_CE 4.3.5.0 (r100000202024123117-5d6cb5cbc3f7c1ab6eb22e40abec8e160a8764d5) (Built Dec 31 2024 17:35:01)

Copyright (c) 2000, 2018, OceanBase and/or its affiliates. All rights reserved.

Type 'help;' or '\h' for help. Type '\c' to clear the current input statement.

obclient(root@sys)[(none)]> show databases;
+--------------------+
| Database           |
+--------------------+
| information_schema |
| LBACSYS            |
| mysql              |
| ob_htap_demo       |
| oceanbase          |
| ocs                |
| ORAAUDITOR         |
| SYS                |
| sys_external_tbs   |
| test               |
| test_db            |
+--------------------+
11 rows in set (0.003 sec)

obclient(root@sys)[(none)]>

2. 访问 OCP Express 控制台
192.168.2.12:8180/login
账号:admin
密码:########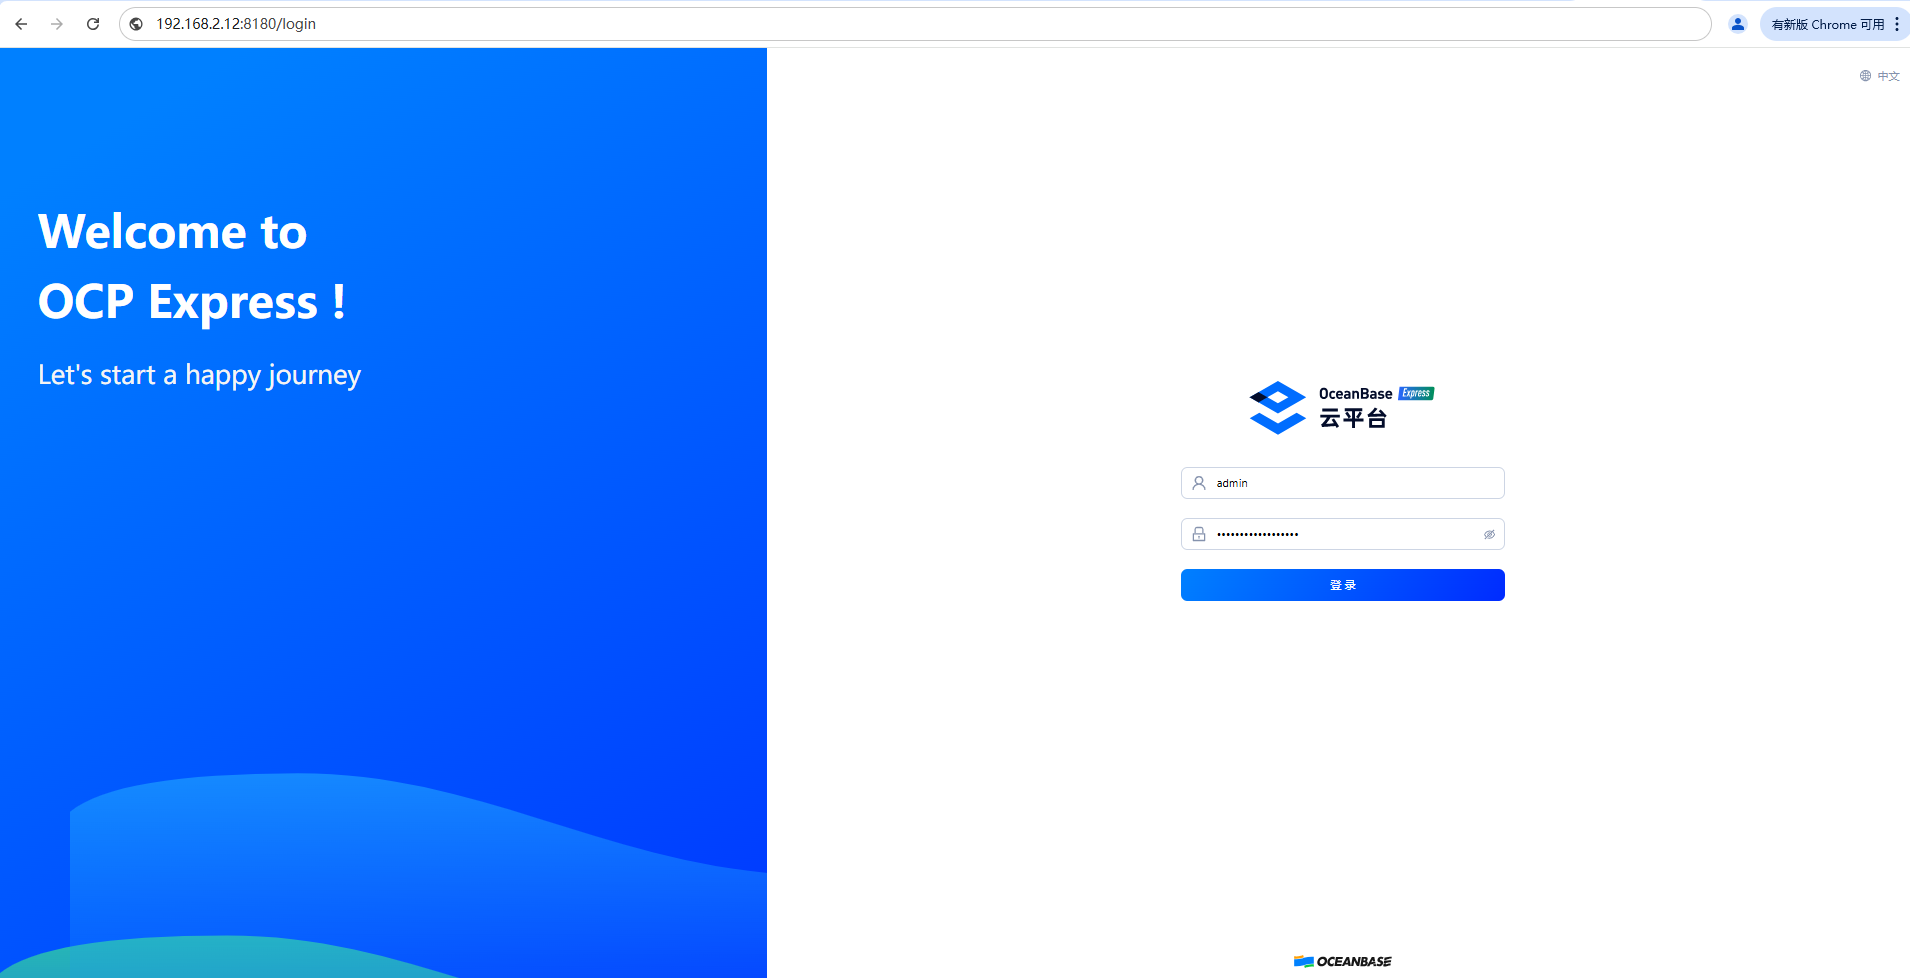
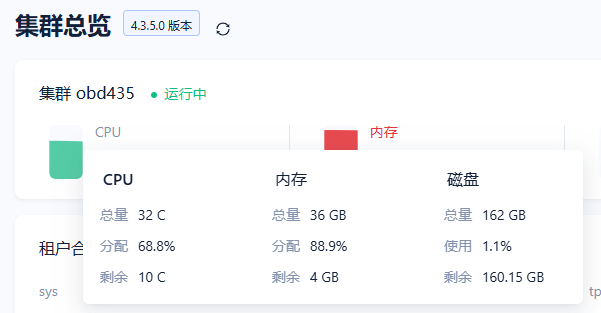
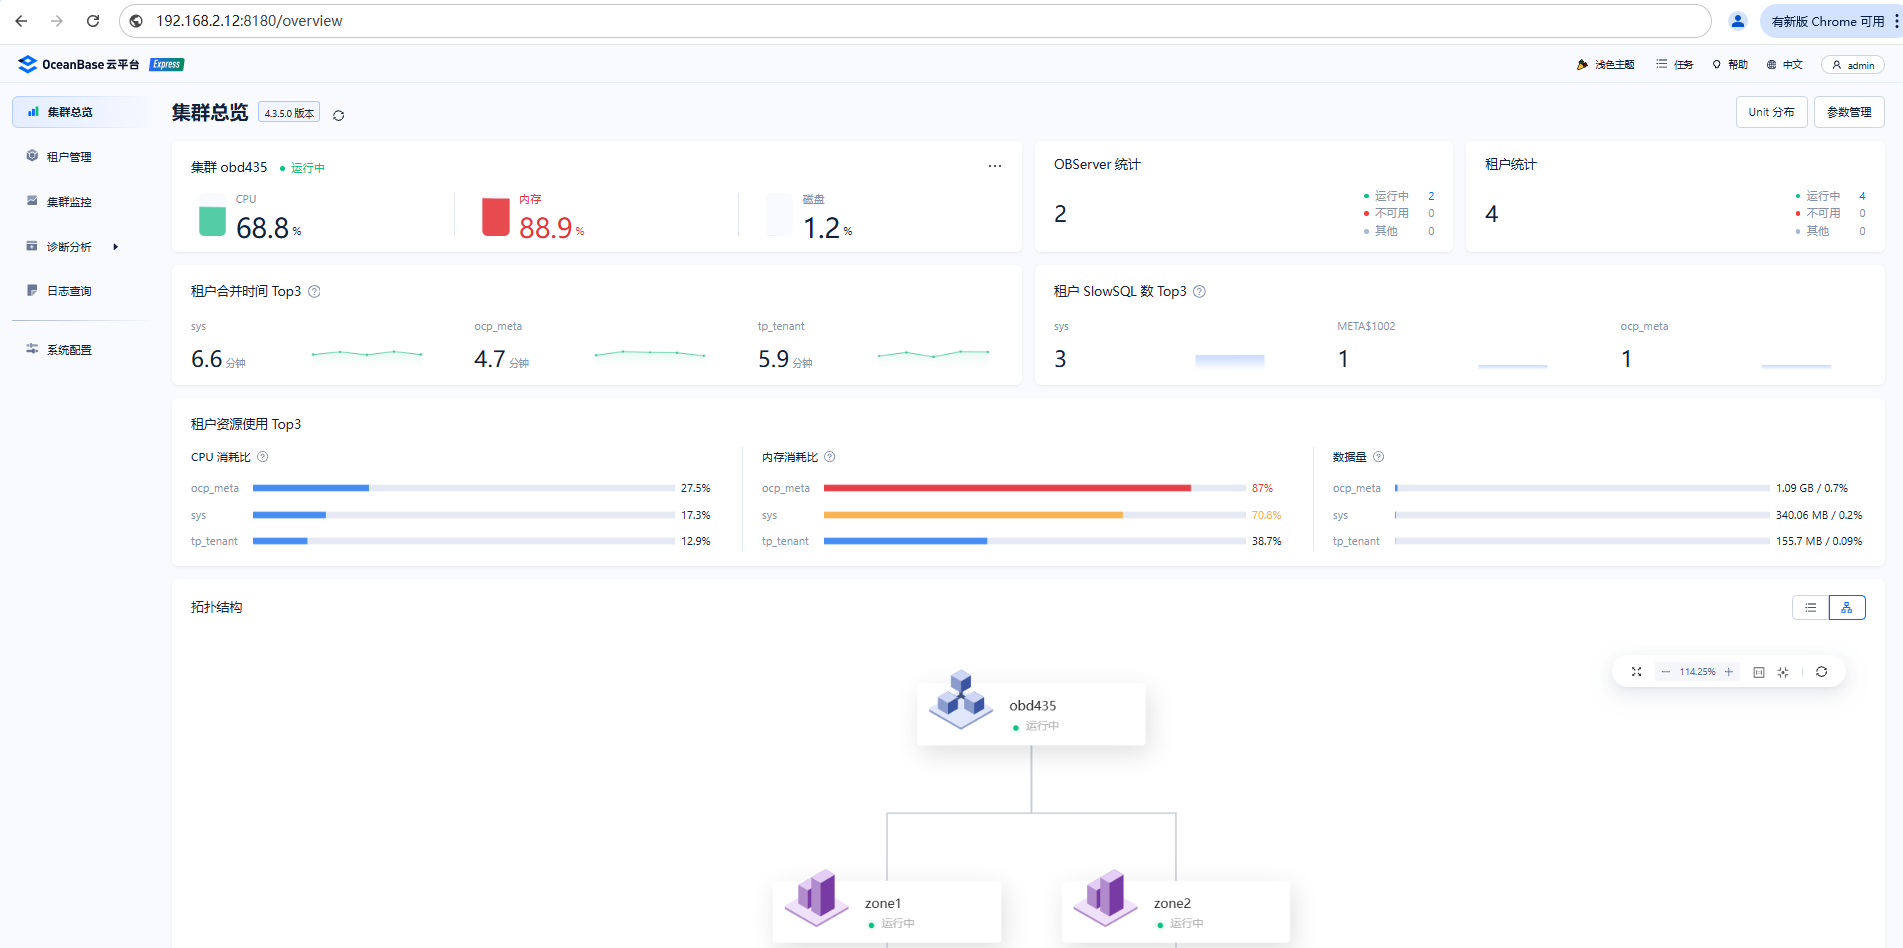
3. 访问 OCP Express 集群总览
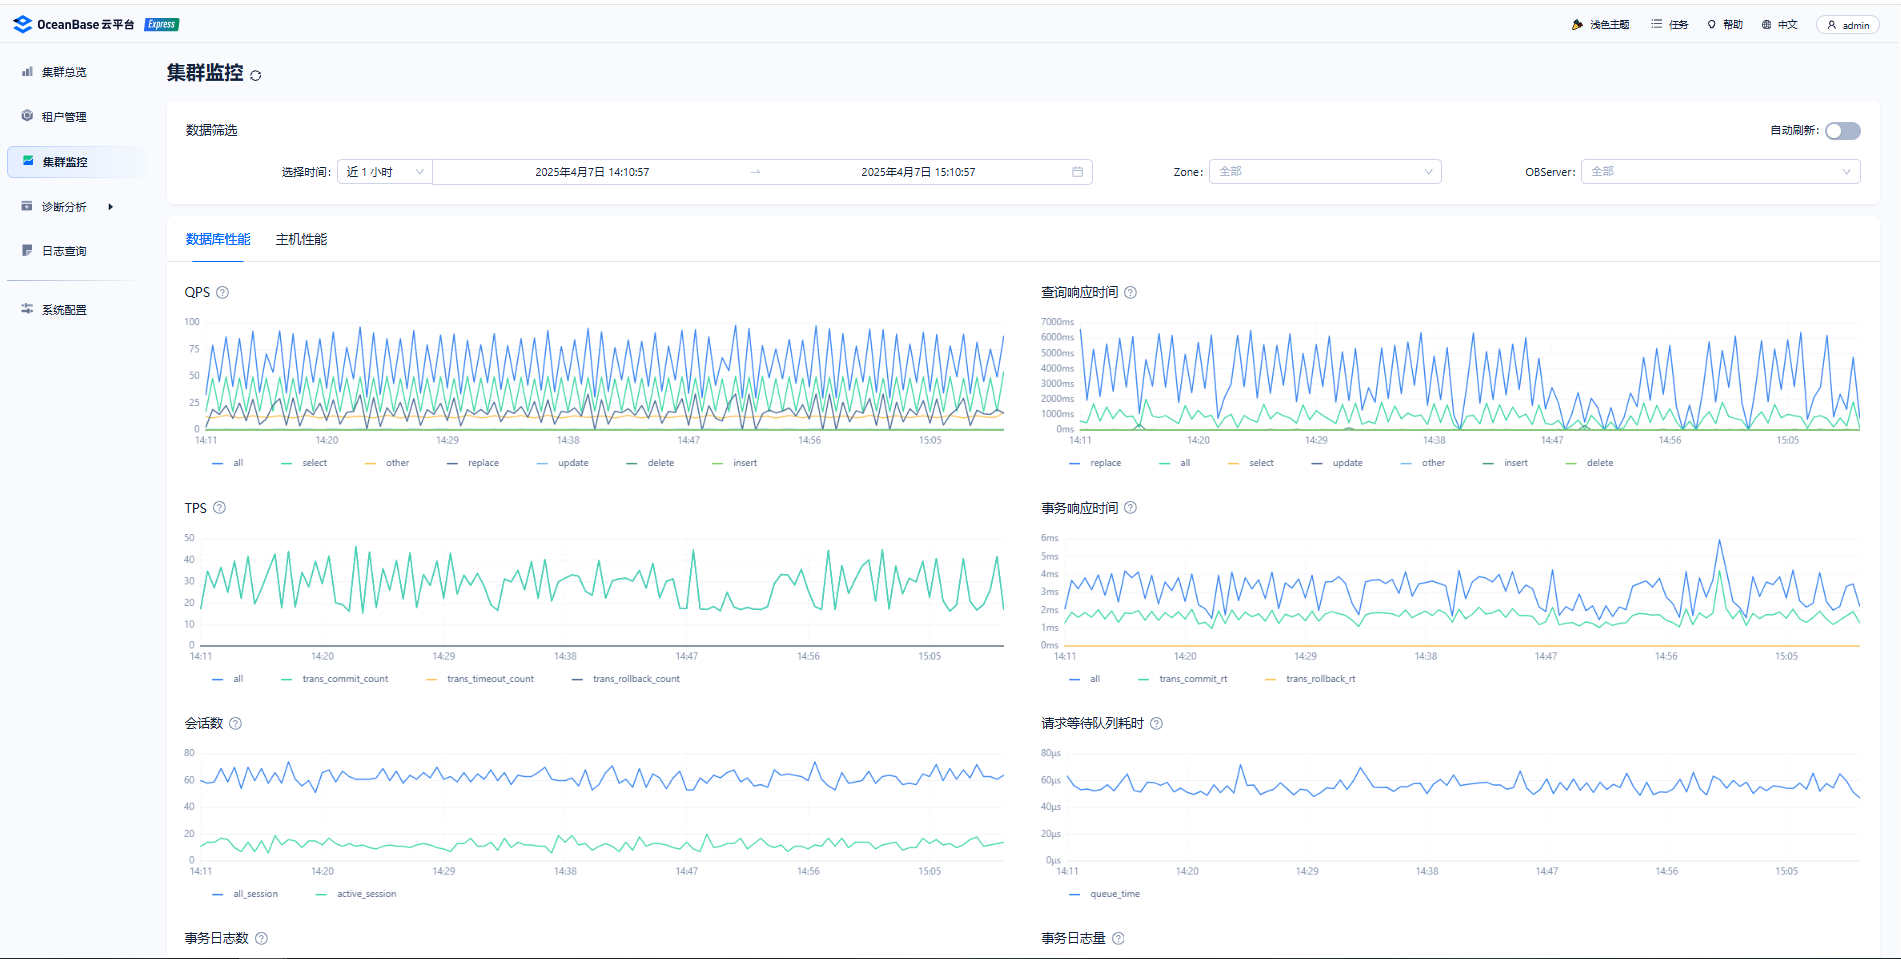
4. 查看集群(数据库性能)监控
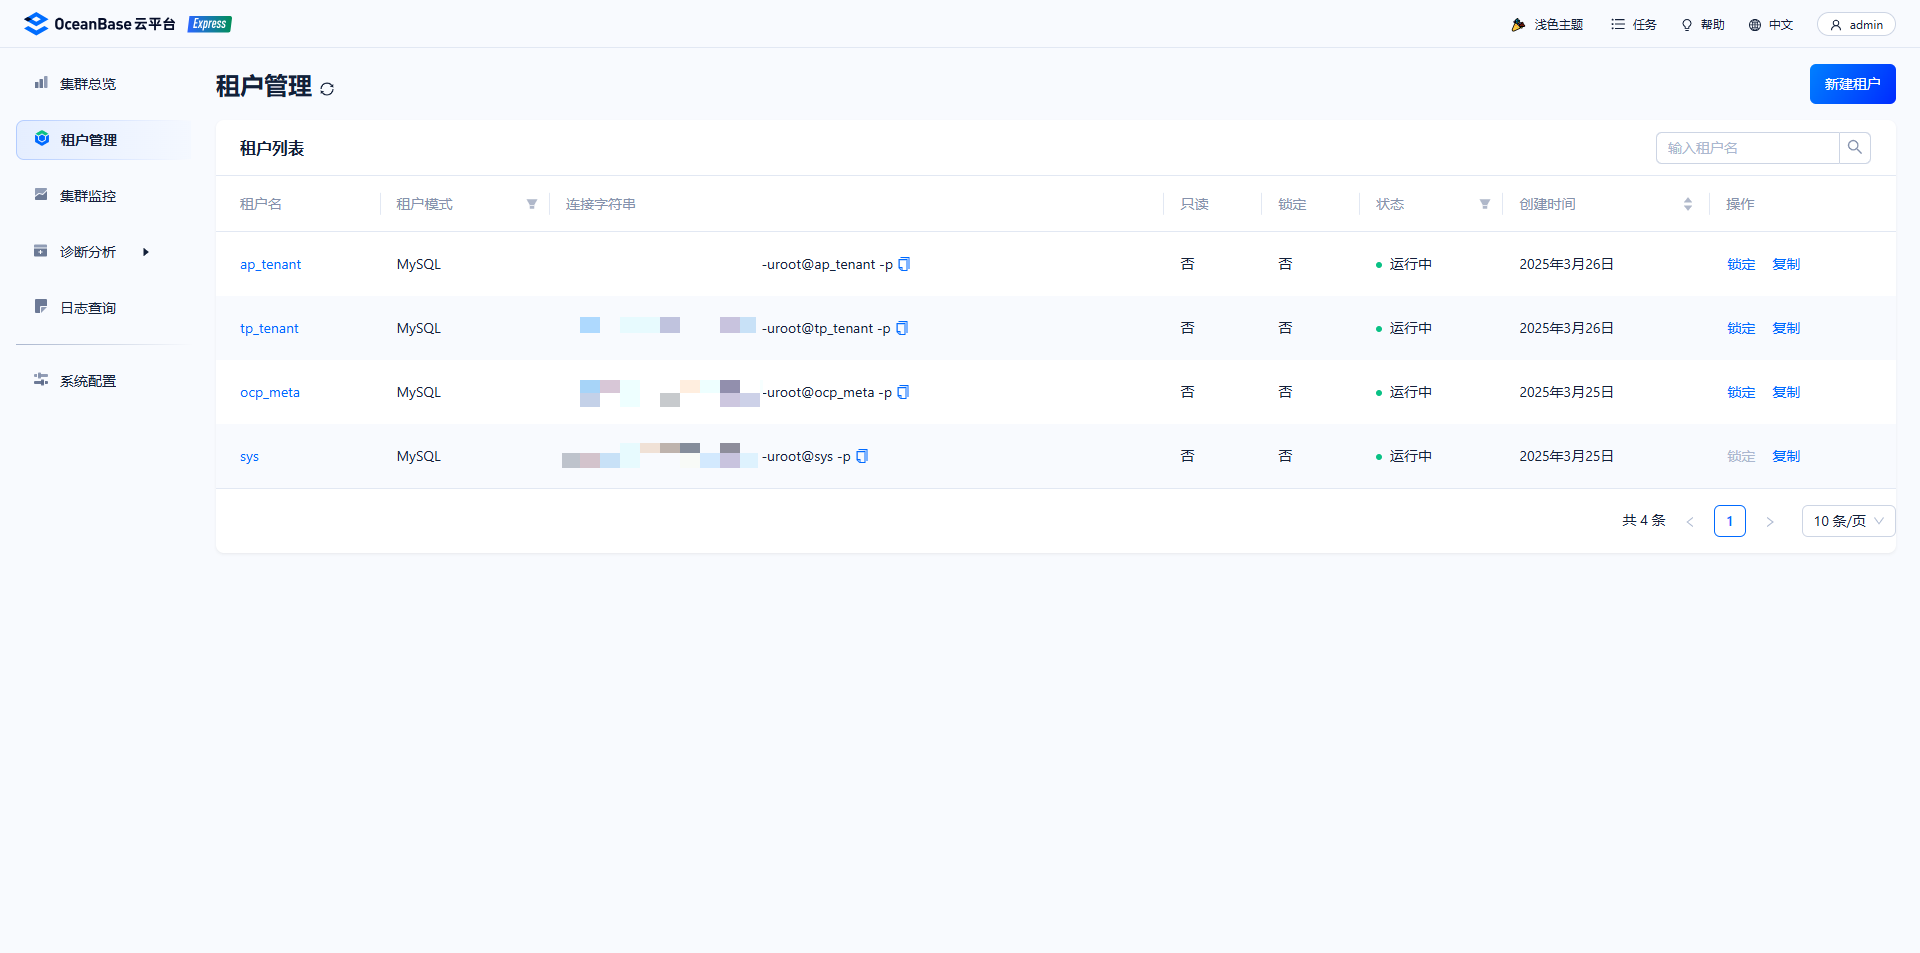
5. 租户管理
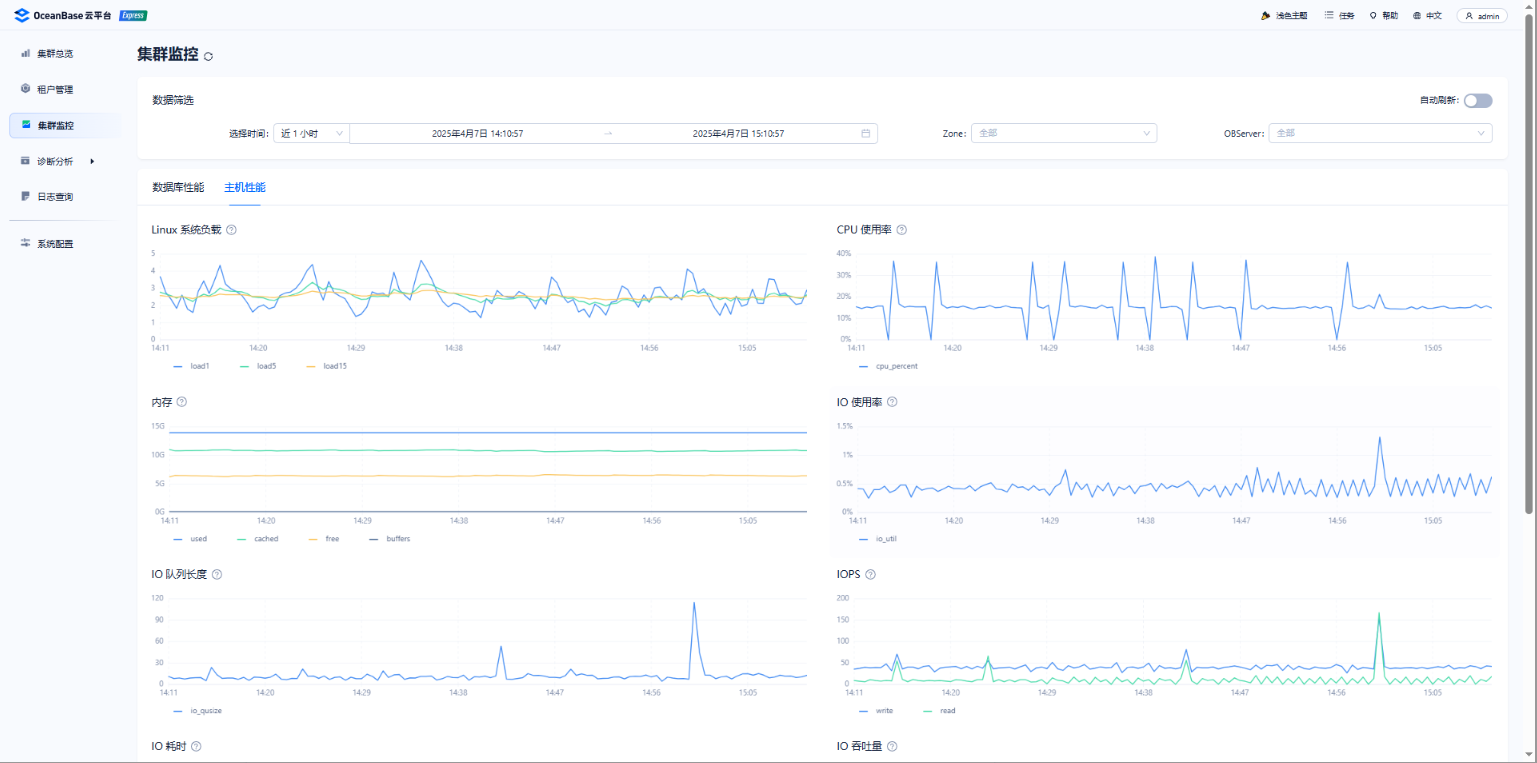
6. 查看集群(主机性能)监控
五、集群管理
5.1 常用管理命令
▶ 查看集群列表
[root@worker3 ~]# obd cluster list输出示例:
+----------------------------------------------------+
|                    Cluster List                    |
+-------+--------------------------+-----------------+
| Name  | Configuration Path       | Status (Cached) |
+-------+--------------------------+-----------------+
| obd435 | /root/.obd/cluster/ob435 | running         |
+-------+--------------------------+-----------------+
▶ 查看集群状态
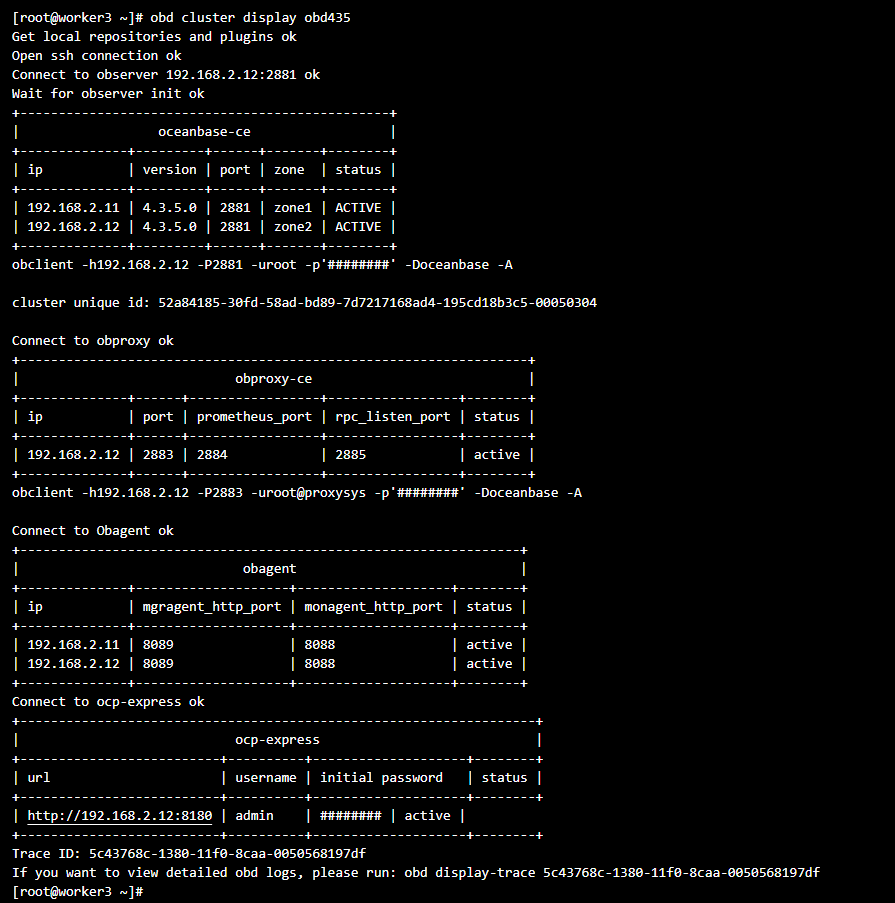
obd cluster display <集群名>  # 示例:obd cluster display ob435
[root@worker3 ~]# obd cluster display obd435
Get local repositories and plugins ok
Open ssh connection ok
Connect to observer 192.168.2.12:2881 ok
Wait for observer init ok关键输出:
+------------------------------------------------+
|                  oceanbase-ce                  |
+--------------+---------+------+-------+--------+
| ip           | version | port | zone  | status |
+--------------+---------+------+-------+--------+
| 192.168.2.11 | 4.3.5.0 | 2881 | zone1 | ACTIVE |
| 192.168.2.12 | 4.3.5.0 | 2881 | zone2 | ACTIVE |
+--------------+---------+------+-------+--------+
obclient -h192.168.2.12 -P2881 -uroot -p'########' -Doceanbase -A

cluster unique id: 52a84185-30fd-58ad-bd89-7d7217168ad4-195cd18b3c5-00050304

Connect to obproxy ok
+------------------------------------------------------------------+
|                            obproxy-ce                            |
+--------------+------+-----------------+-----------------+--------+
| ip           | port | prometheus_port | rpc_listen_port | status |
+--------------+------+-----------------+-----------------+--------+
| 192.168.2.12 | 2883 | 2884            | 2885            | active |
+--------------+------+-----------------+-----------------+--------+
obclient -h192.168.2.12 -P2883 -uroot@proxysys -p'########' -Doceanbase -A

Connect to Obagent ok
+-----------------------------------------------------------------+
|                             obagent                             |
+--------------+--------------------+--------------------+--------+
| ip           | mgragent_http_port | monagent_http_port | status |
+--------------+--------------------+--------------------+--------+
| 192.168.2.11 | 8089               | 8088               | active |
| 192.168.2.12 | 8089               | 8088               | active |
+--------------+--------------------+--------------------+--------+
Connect to ocp-express ok
+-------------------------------------------------------------------+
|                            ocp-express                            |
+--------------------------+----------+--------------------+--------+
| url                      | username | initial password   | status |
+--------------------------+----------+--------------------+--------+
| http://192.168.2.12:8180 | admin    | ######## | active |
+--------------------------+----------+--------------------+--------+
Trace ID: 5c43768c-1380-11f0-8caa-0050568197df
If you want to view detailed obd logs, please run: obd display-trace 5c43768c-1380-11f0-8caa-0050568197df
[root@worker3 ~]#
5.2 常见问题处理
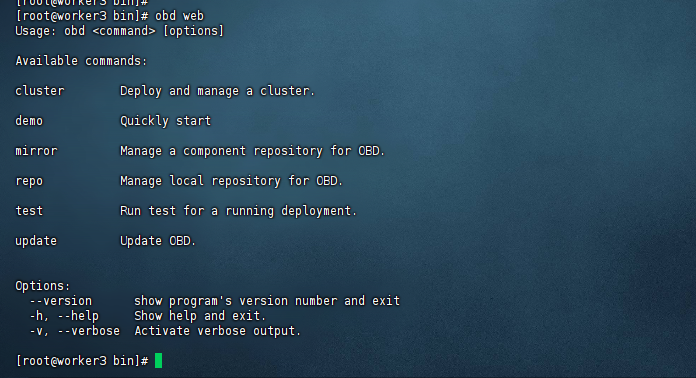
▶ 启动图形化界面报错
错误现象:
[root@worker3 bin]# obd web
Usage: obd <command> [options]

Available commands:

cluster        Deploy and manage a cluster.

demo           Quickly start

mirror         Manage a component repository for OBD.

repo           Manage local repository for OBD.

test           Run test for a running deployment.

update         Update OBD.


Options:
  --version      show program's version number and exit
  -h, --help     Show help and exit.
  -v, --verbose  Activate verbose output.

[root@worker3 bin]#
输出:显示旧版 OBD 命令帮助信息
解决方案:
- 检查 OBD 版本:
[root@worker3 ~]# obd --version
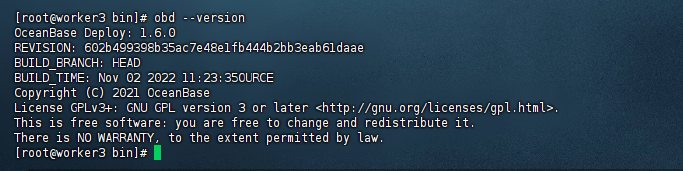
发现 OceanBase Deploy: 版本为1.6.0
- 执行升级:
[root@worker3 ~]# obd update
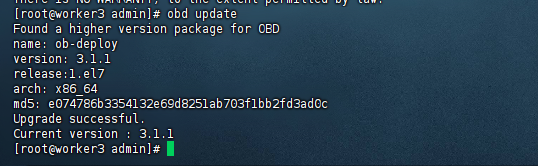
- 验证新版:
[root@worker3 ~]# obd --version预期输出:
OceanBase Deploy: 3.1.1
REVISION: 94b5853a18ad1ad09d5afc30d9edb44643dd488c
BUILD_BRANCH: HEAD
BUILD_TIME: Jan 06 2025 11:35:49OURCE
Copyright (C) 2025 OceanBase
License Apache 2.0: Apache version 2 or later <https://www.apache.org/licenses/LICENSE-2.0>.
This is free software: you are free to change and redistribute it.
There is NO WARRANTY, to the extent permitted by law.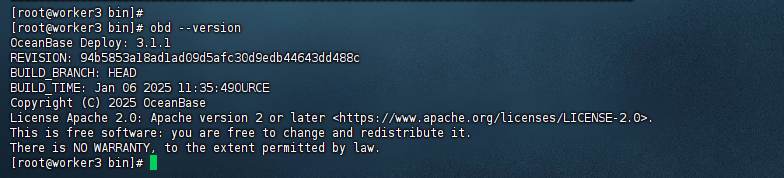
已经升级到 OceanBase Deploy: 3.1.1
六、总结
通过上述步骤,您已经成功地完成了 OceanBase 4.3.5 社区版及 OCP Express 的图形化部署。借助于这些工具,您可以更加高效地构建和维护自己的分布式数据库系统。希望这篇指南对您有所帮助,让您的开发之旅更加顺畅。如果您在部署过程中遇到任何问题,欢迎访问 OceanBase 官方论坛或社区寻求帮助。
注意事项 生产环境建议使用 OBD 3.1.1 及以上版本 定期执行 obd cluster list 监控集群状态 关键操作前备份 /root/.obd/cluster 配置目录
—— 仅供参考。如果有更多具体的问题或需要进一步的帮助,请随时告知。

了解最新的技术洞察和前沿趋势,参与 OceanBase 定期举办的线下活动,与行业开发者互动交流
更多推荐

 22
22 0
0- 0


 已为社区贡献568条内容

所有评论(0)